¶ Sales Orders View
The Sales Orders Page in LodDepot serves as the main workspace, where most interactions with orders are conducted. Grasping the workflow and stages of order processing is crucial for operating correctly within LodDepot and fully utilizing all the tools available
¶ Page Functions
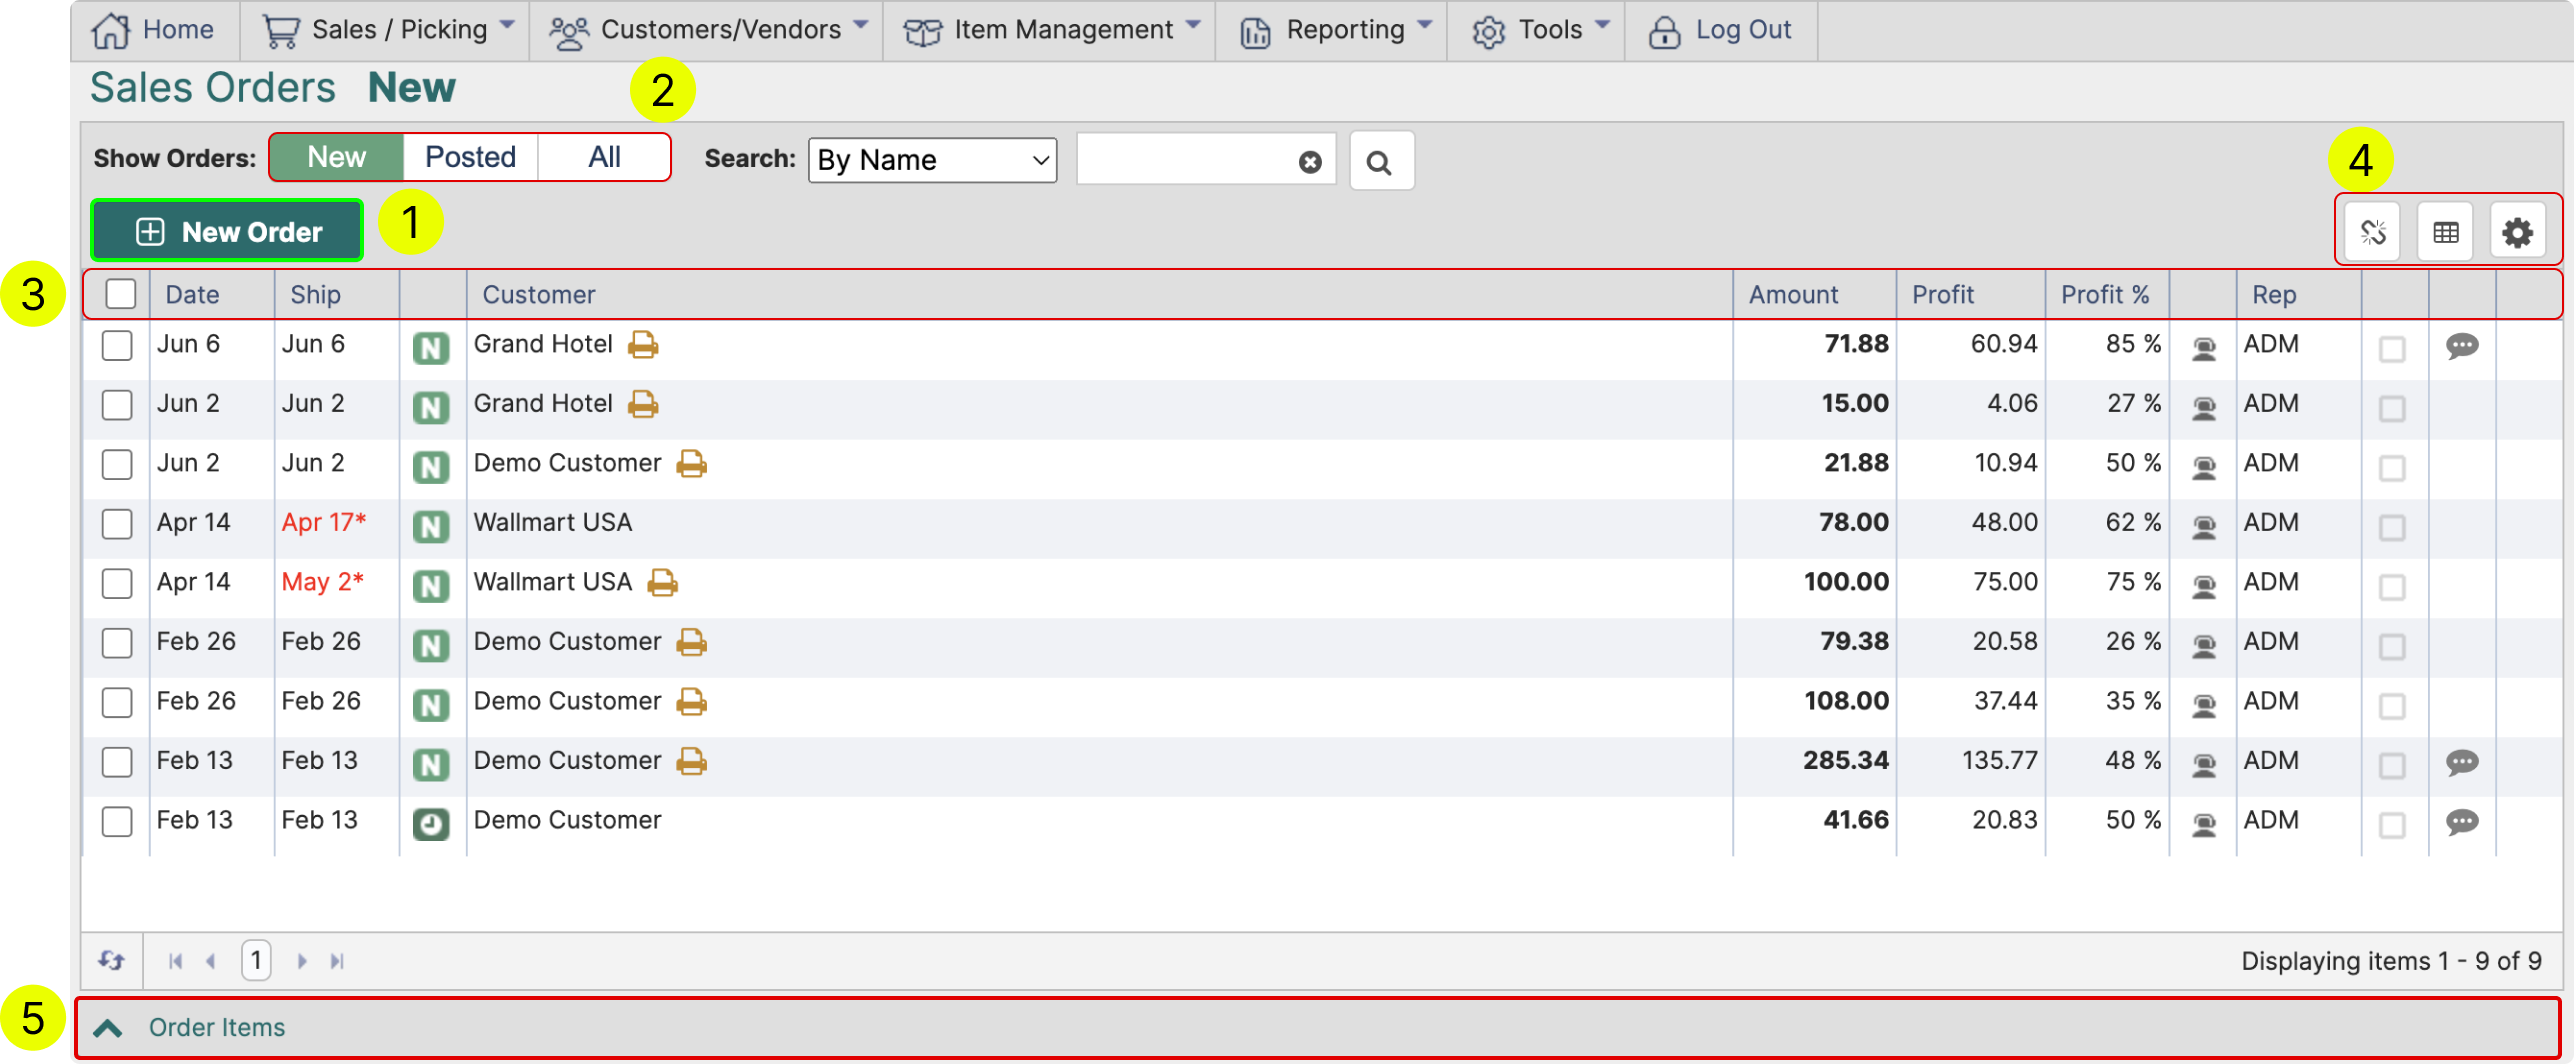
1 Click New Order to start a new office order
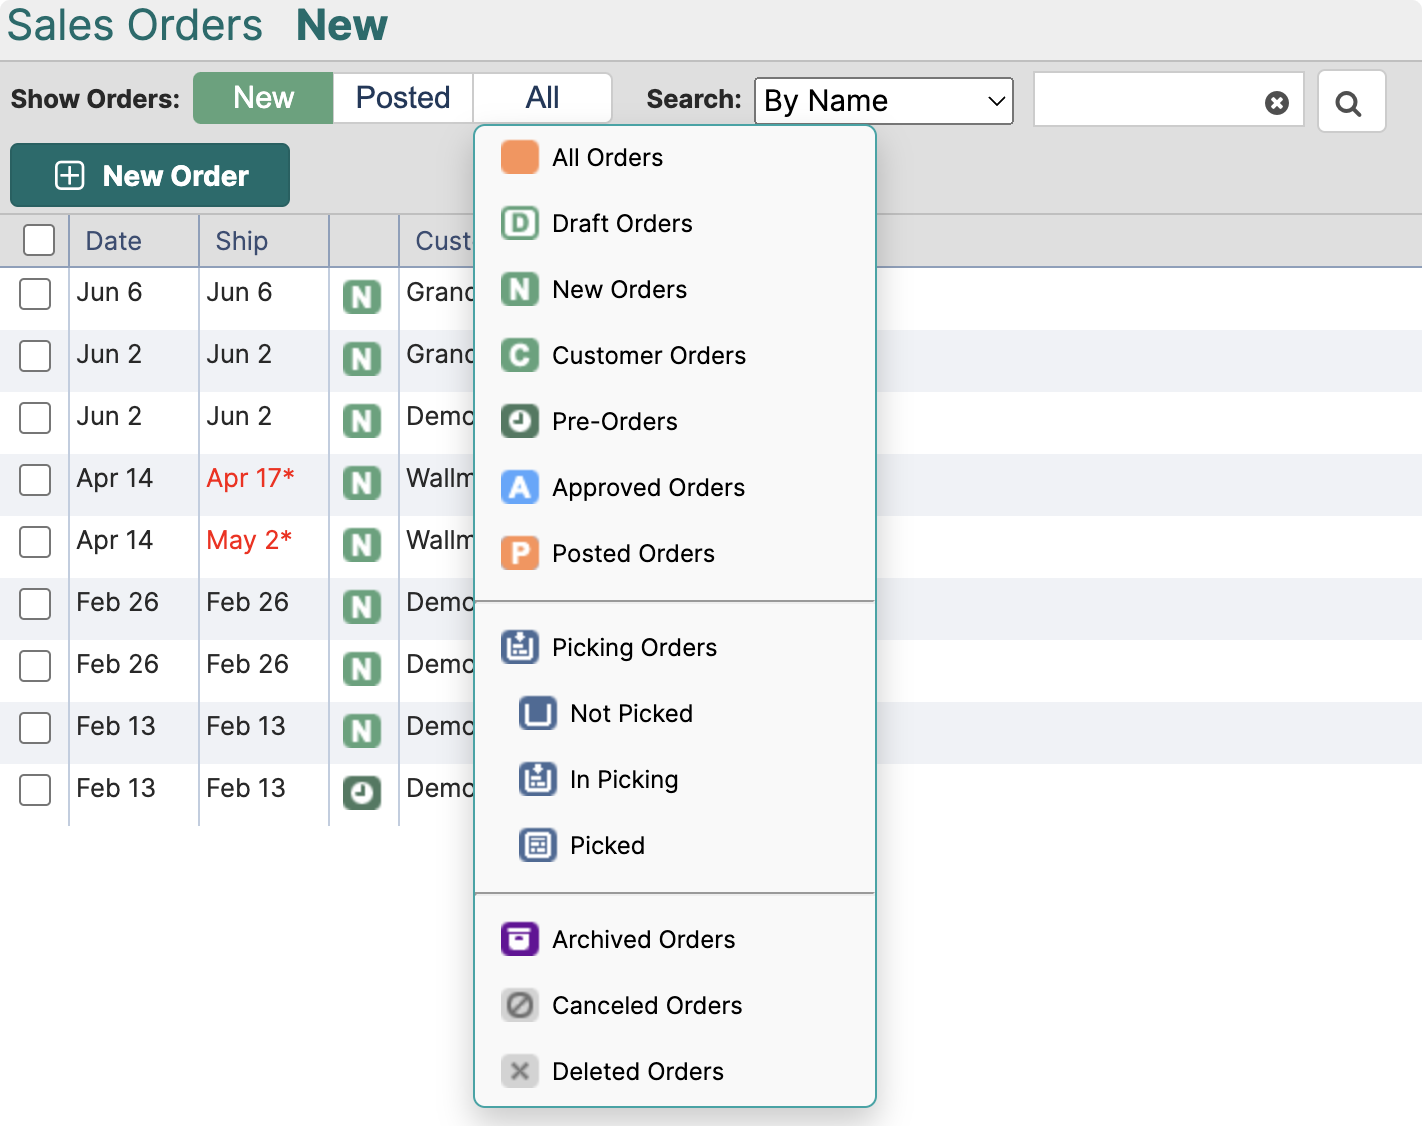
2 Quick selectors for New Orders, Posted Orders and All Orders. Clicking All will give you more selector options.
3 You can sort each section by clicking one of the column headers to switch between ascending and descending order. *Applies to columns: Date, Ship, Customer, Account Number, Count, Weight, Route and Rep.
4
- The Broken Link icon allows you to retrieve unsaved orders in case you accidentally close the window with a new order or lose connection.
- By clicking the Table icon the selected section (New, Posted or All) will be exported as an Excel file.
- The Gear icon allows you to optimize the visibility of columns in LodDepot and Excel export.
5 Order Items is a quick way to see all items inside each order. Select an order by clicking on it and then click order items to expand the list.
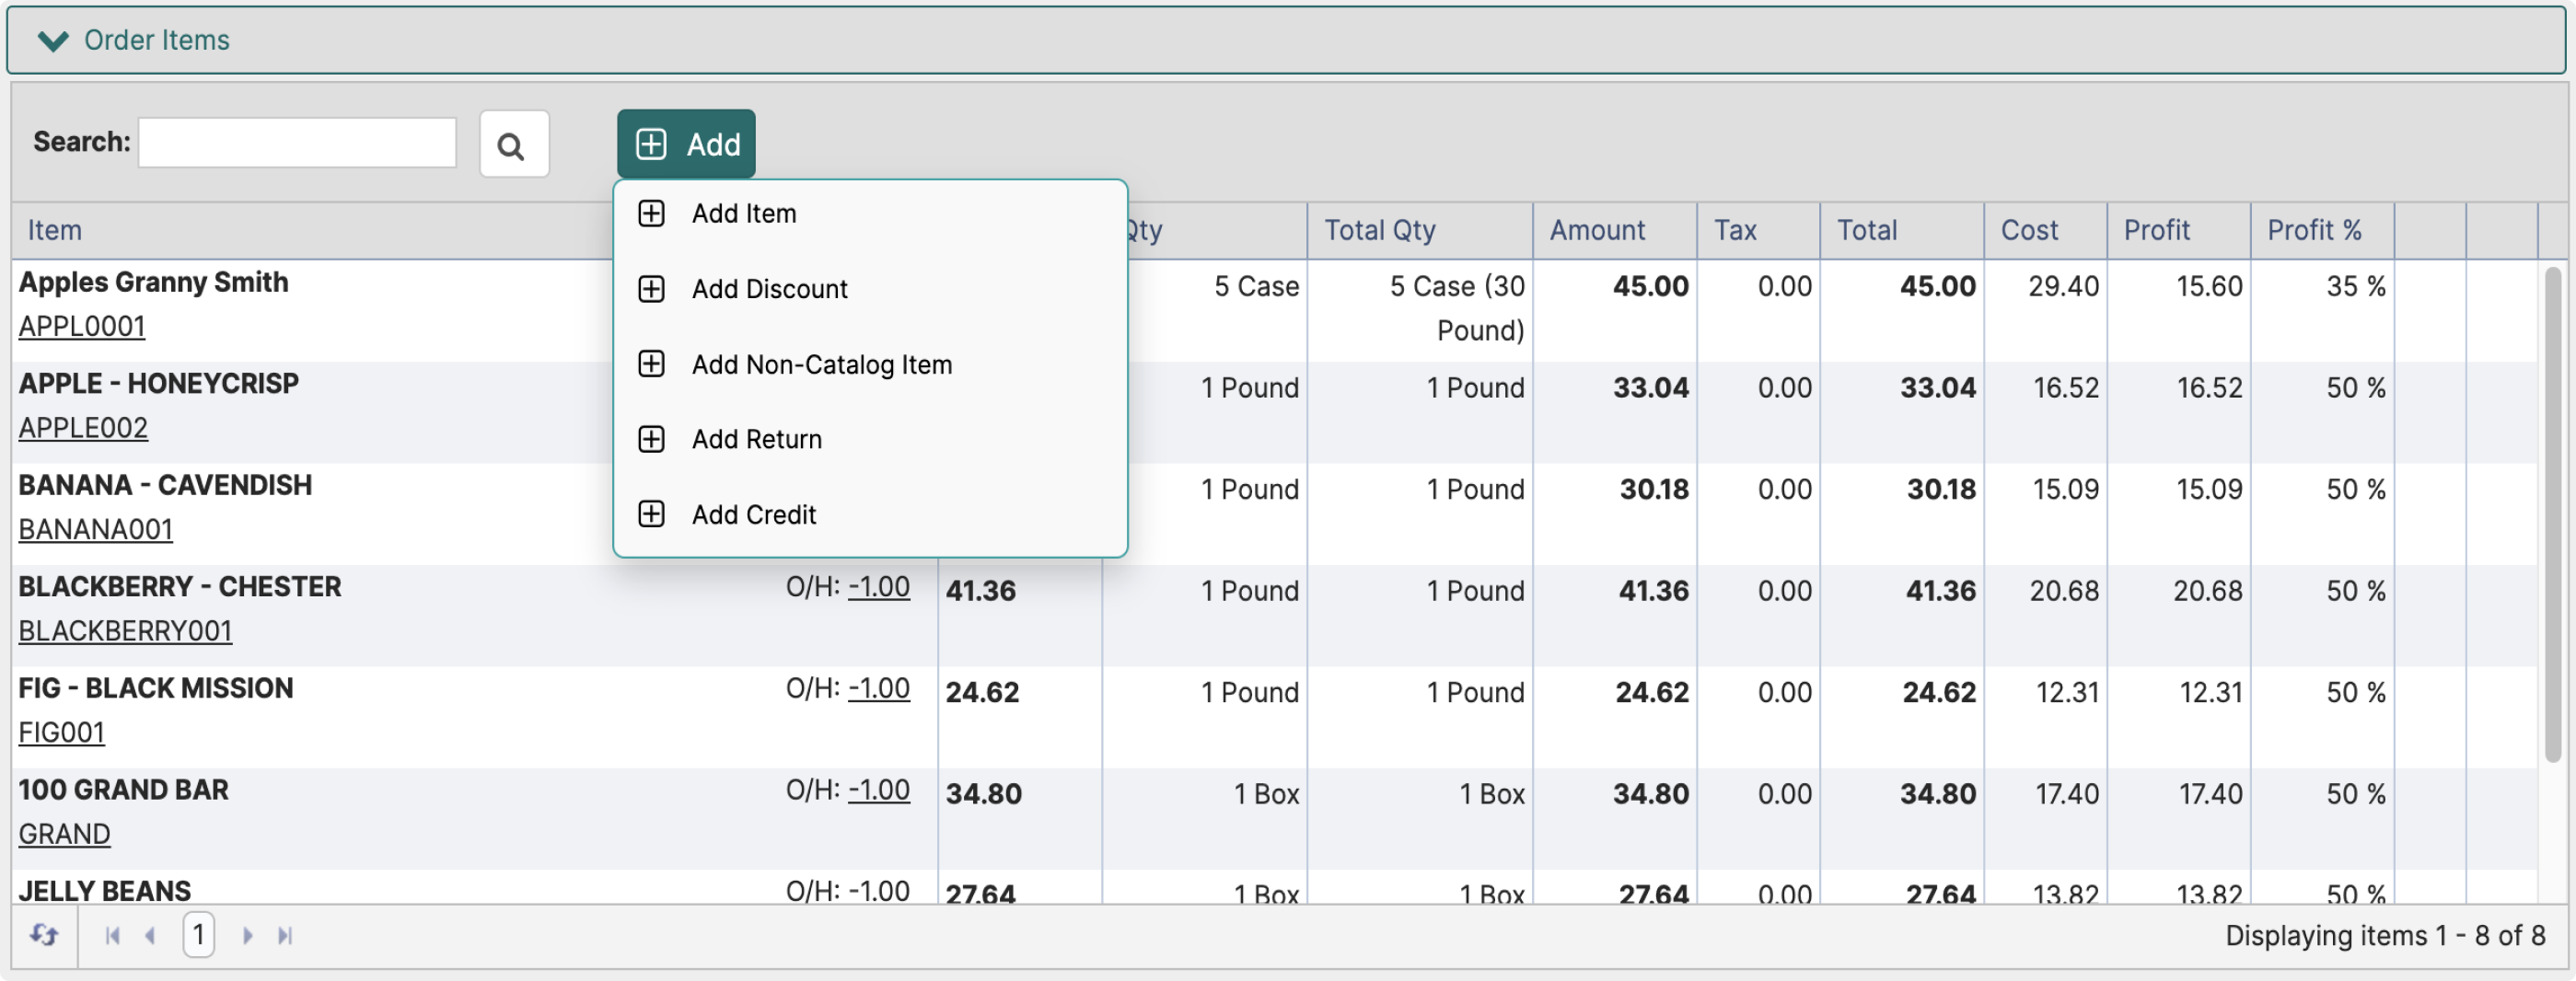
- Within the Order Items you can quickly add new Items, Discounts, Non-Catalog Items, Returns and Customer Credit.
¶ Search
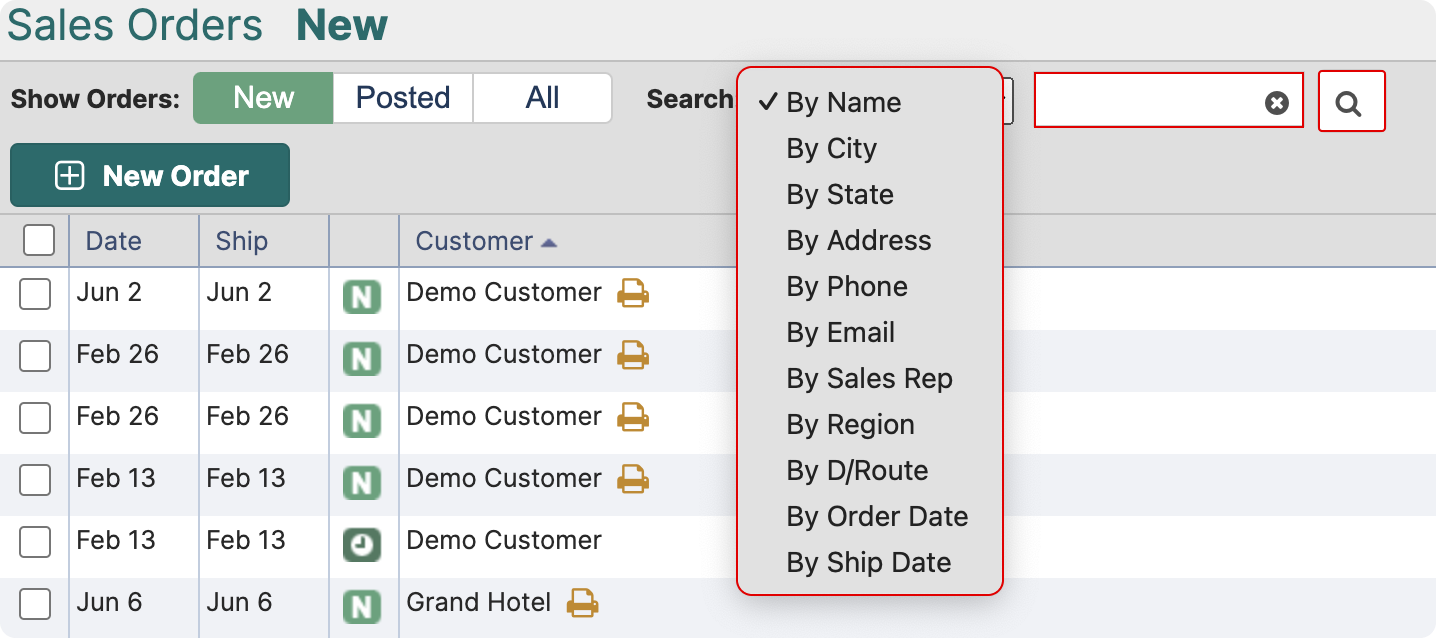
You can also use the search function to quickly sort through the orders. LodDepot allows you to search orders by multiple parameters. Select one of them on the left-hand side of the search bar, then enter the value that you are searching for and, lastly, click the search icon to return the results.
e.g. Search By State → Value: NY
Parameters Sales Rep, Region, D/Route will have a dropdown options.
Order Date and Ship Date will have a calendar to help you quickly pick the required date.
¶ Orders Flow
Each Sales Order has a status associated with it. The diagram below depicts the flow of each order from the moment you receive/create the order to the point when order is delivered and archived.

- Orders can be created via Office, Web Store or Mobile.
- Once the order is created, it appears in the “New Orders” Selector.
- New orders can be temporarily saved as Draft Orders or Pre-Orders. Pre order status can be assigned manually or it will be automatically assigned if there are pre-order items within the order.
- If the order is ready to be processed, it needs to be approved. Upon approval of the order, the status of the order will change to Posted. If you are using an ERP/Quickbooks integration, the status will firstly change to Approved and then automatically switch to Posted status once the order is created in ERP/Quickbooks.
*The settings can be change to automatically approve all orders upon their receipt.
Tools→Settings→Sales Orders→Automation - After the order is posted, it can be sent to Picking. Extended Picking functionality is available with the Premium Plus Package.
- When the order is picked, it returns back to Posted until it is delivered and eventually archived.
* Please see the section below for more details about how to change orders' statuses.
¶ Working with the Orders
By clicking on the order select one or multiple orders to access the quick actions menu.

(1) Edit allows you to go into the order to make changes such as add or remove items, change prices, change ship date and ship type, enter comments or save the order as Draft.
(2) Approve Orders button will move the order into the next stage of the Order Flow and change it's status to Posted.
(3) If you track payments via LodDepot, you can select an order and add a record of payment.
To enable Payment tracking go to Tools→Settings→Features
(4) If you select an order in the Posted section, then instead of the Approve Orders button, you will have an option to send the order for picking .

(5) Continued Below
¶ Quick Actions: More Menu
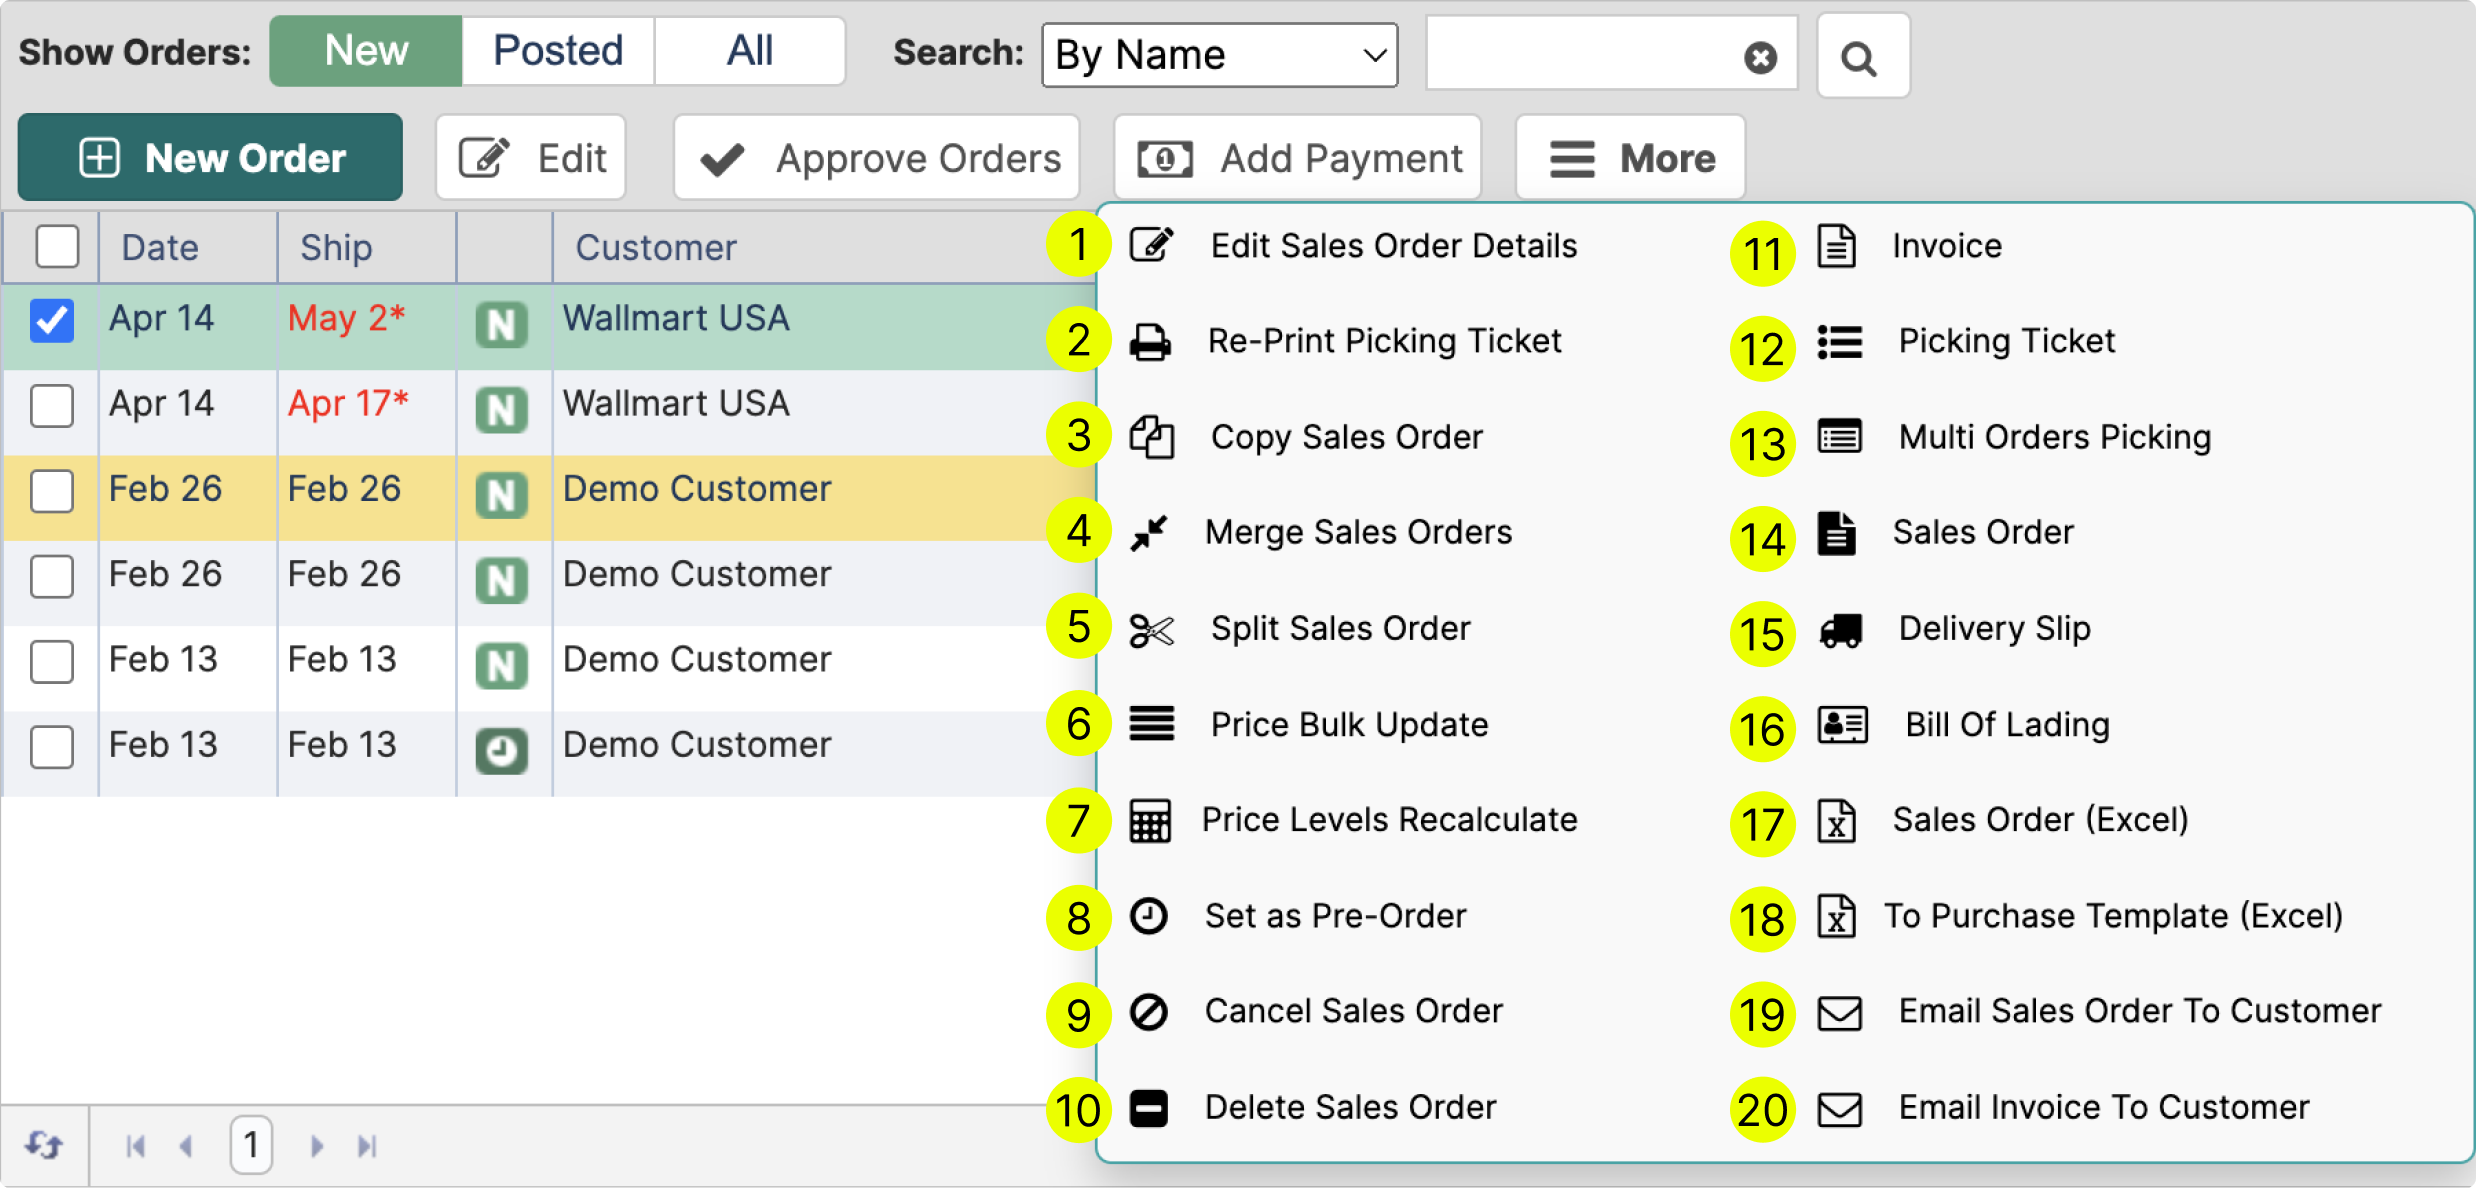
- Edit Sales Order Details grants a quick access to the following features:
- Order Parameters
Change main parameters of the order such as, order and shipping dates, sales rep, order manager, term, account receivable, order tag or add comments and customer notes to the order. - Delivery Data
Here you can select the route and the stop number, add a delivery note, and customize your Bill of Landing. - Files
If you generate invoices through a third party application, you can upload them to the Files tab. Also, files tab is a convenient way to save signed copies of the invoices. - System
Get system information about the order such as, Order ID, GUID and Sync information. - Action Log
Action Log is a list of performed actions that relate to that particular order.
- Order Parameters
- Re-Print Picking Ticket
If you make changes to the order after the Picking Ticket has been printed, you can quickly send the updated Picking Ticket to the Printer. - Copy Sales Order
This function allows you to create a copy the selected order. You can change the customer, shipping type and date, and decide which prices to apply.
4. Merge Sales Orders
This function allows you to combine two or more sales orders into one. All merging orders must have the same status and be from the same customer.
5. Split Sales Order
This function allows you to split one sales order into two or more by the following criteria:
- By Item Invoice Category
- By Items
- By Pre-Order Status
6. Price Bulk Update
When you select multiple orders and click Price Bulk Update, the system will return a list of all unique items within the selected orders. You will have an option to alter the price for each item and subsequently apply that price to all selected orders.
7. Price Level Recalculate
This action refreshes the prices based on the current Price Level that applies to the selected customer.
8. Set as Pre Order / Set as New Order / Archive Order
The functionality of this button varies depending on the state of the order. If the order status is New, you can change it to Pre-Order status and vice versa for Pre Orders. For Posted orders, this button will give you an option of changing the status to Archived.
9. Cancel Sales Order
10. Delete Sales Order
The main difference between deleting and canceling the order is that Cancelled orders will still be reflected in the reports.
11. Invoice
Get a quick access to the .PDF Invoice
12. Picking Ticket
Get a quick access to the .PDF Picking Ticket or automatically send it to print.
13. Multi-Orders Picking
Select multiple orders to combine them into one Picking Ticket.
14. Sales Order
Get a quick access to the .PDF Sales Order
15. Delivery Slip
Get a quick access to the .PDF Delivery Slip
16. Bill of Landing
Get a quick access to the .PDF Bill of Landing
17. Sales Order (Excel)
Get a quick access to the .xlsx Sales Order
18. To Purchase Template (Excel)
This quick action will create a Purchase Template in Excel based on all items within the order selected.
19. Email Sales Order to Customer
A Sales Order will be emailed to the main customer's email.
*Emails are free of charge
20. Email Invoice to Customer
An Invoice will be emailed to the main customer's email.
*Emails are free of charge
¶ Quick Actions: Right Click
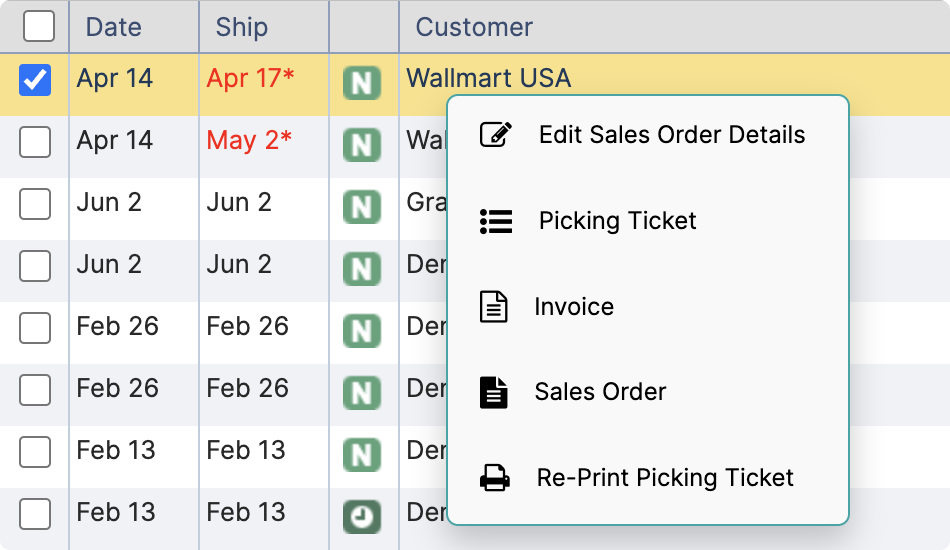
Another way to quickly interact with Sales Orders is to Right-Click on one of the orders. You will get the following menu and the following actions can be performed:
- Edit Sales Order Details
- Picking Ticket - access the .PDF Picking Ticket
- Invoice - access the .PDF Invoice
- Sales Order - access the .PDF Sales Order
- Re-Print Picking Ticket
¶ Order Information
When you select an order, on the right hand side of the screen Order Information Tab will appear. Here you can view information about the order and the customer. You can also quickly navigate to the Customer card by clicking the button next to the Customer name (1).
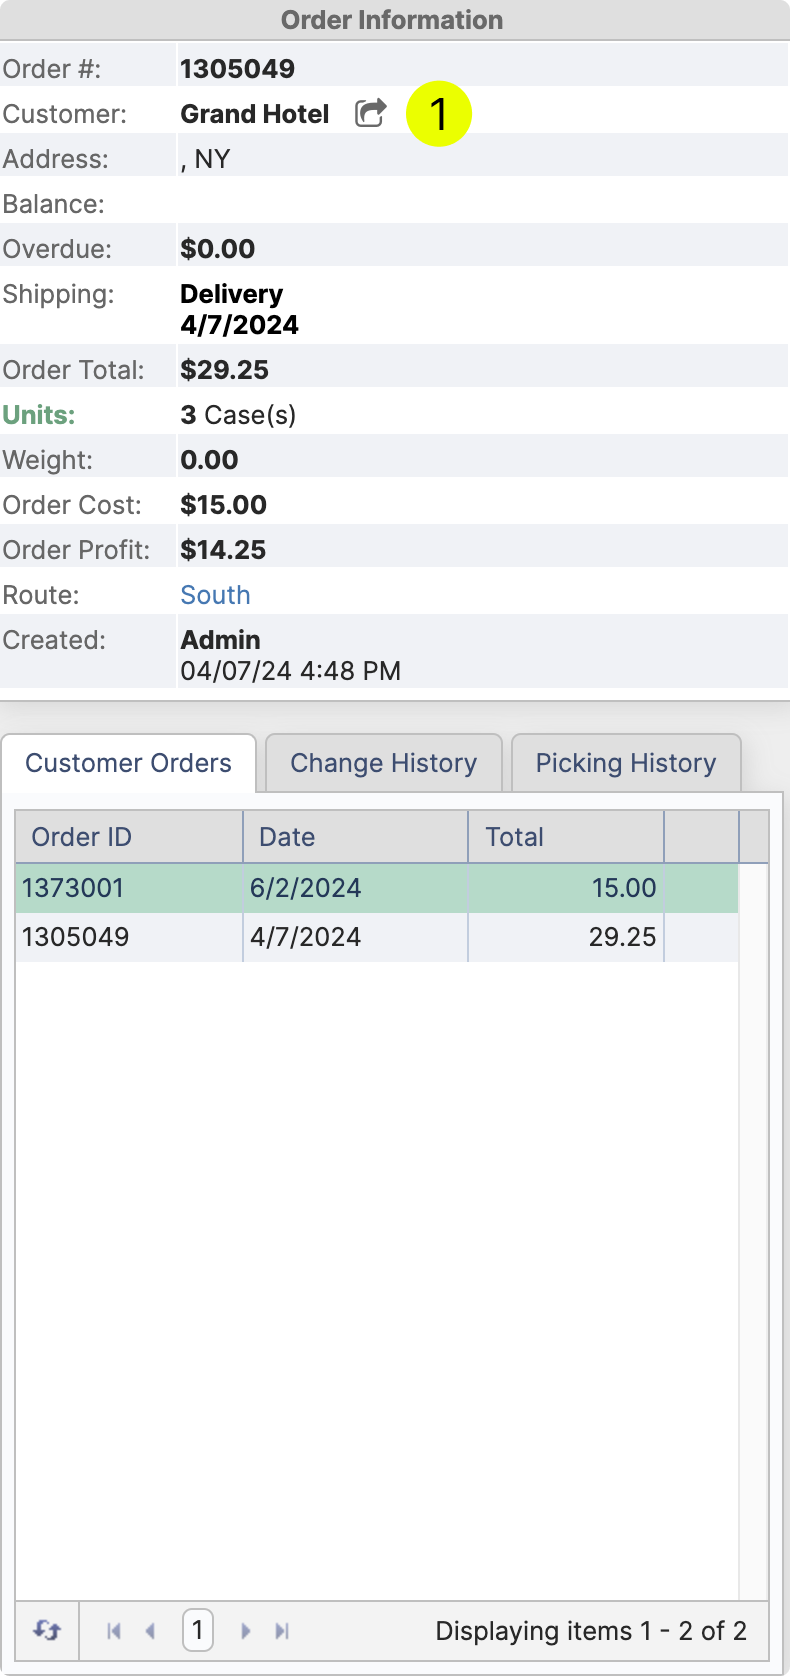
At the bottom section, you have three tabs:
- Customer Orders
View all past order of the selected customer. - Change History
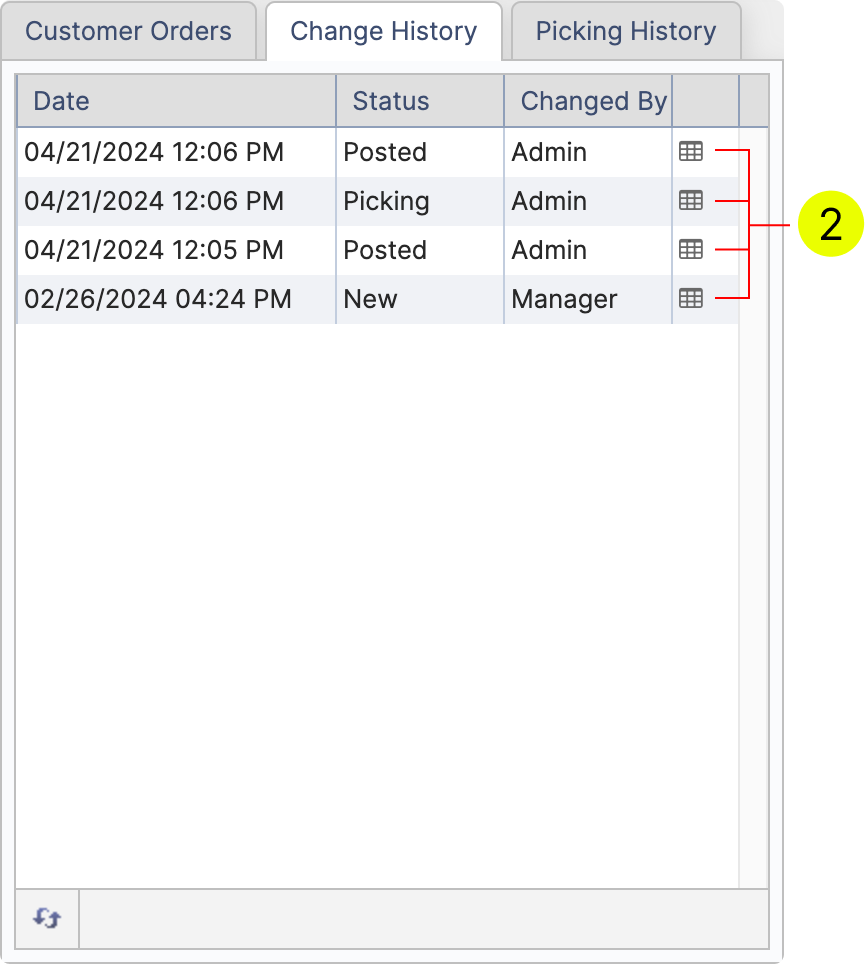
This tab relates to the selected order and allows you to view how the order was changed from the time it was created. To view in more detail click the button next to the stage, which you want to view (2).
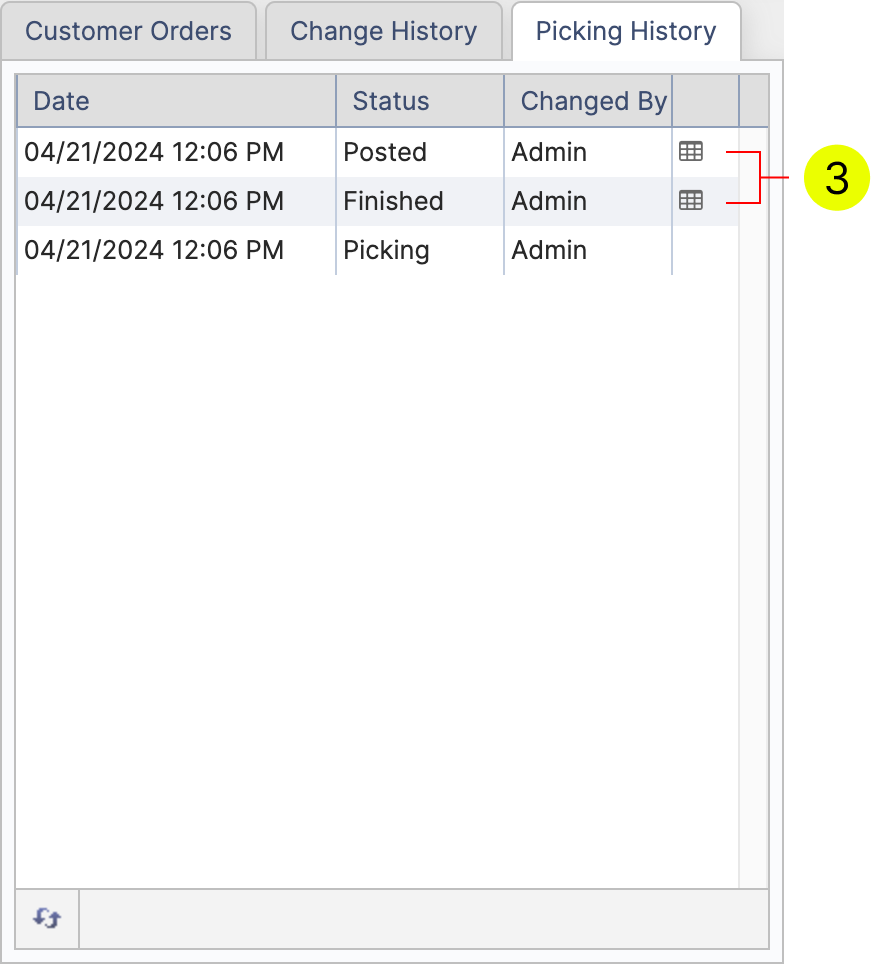
- Picking History
Similarly to Change History, Picking History allows you to view changes made to the order during the Picking stage. To view in detail click the button next to the Picking Stage (3).
