¶ Banner Manager
* Please note that Banner Manager is used solely for the purpose of creating banners within the Catalog and Web Store. To create an automated promo or discount use Price Level Manager.
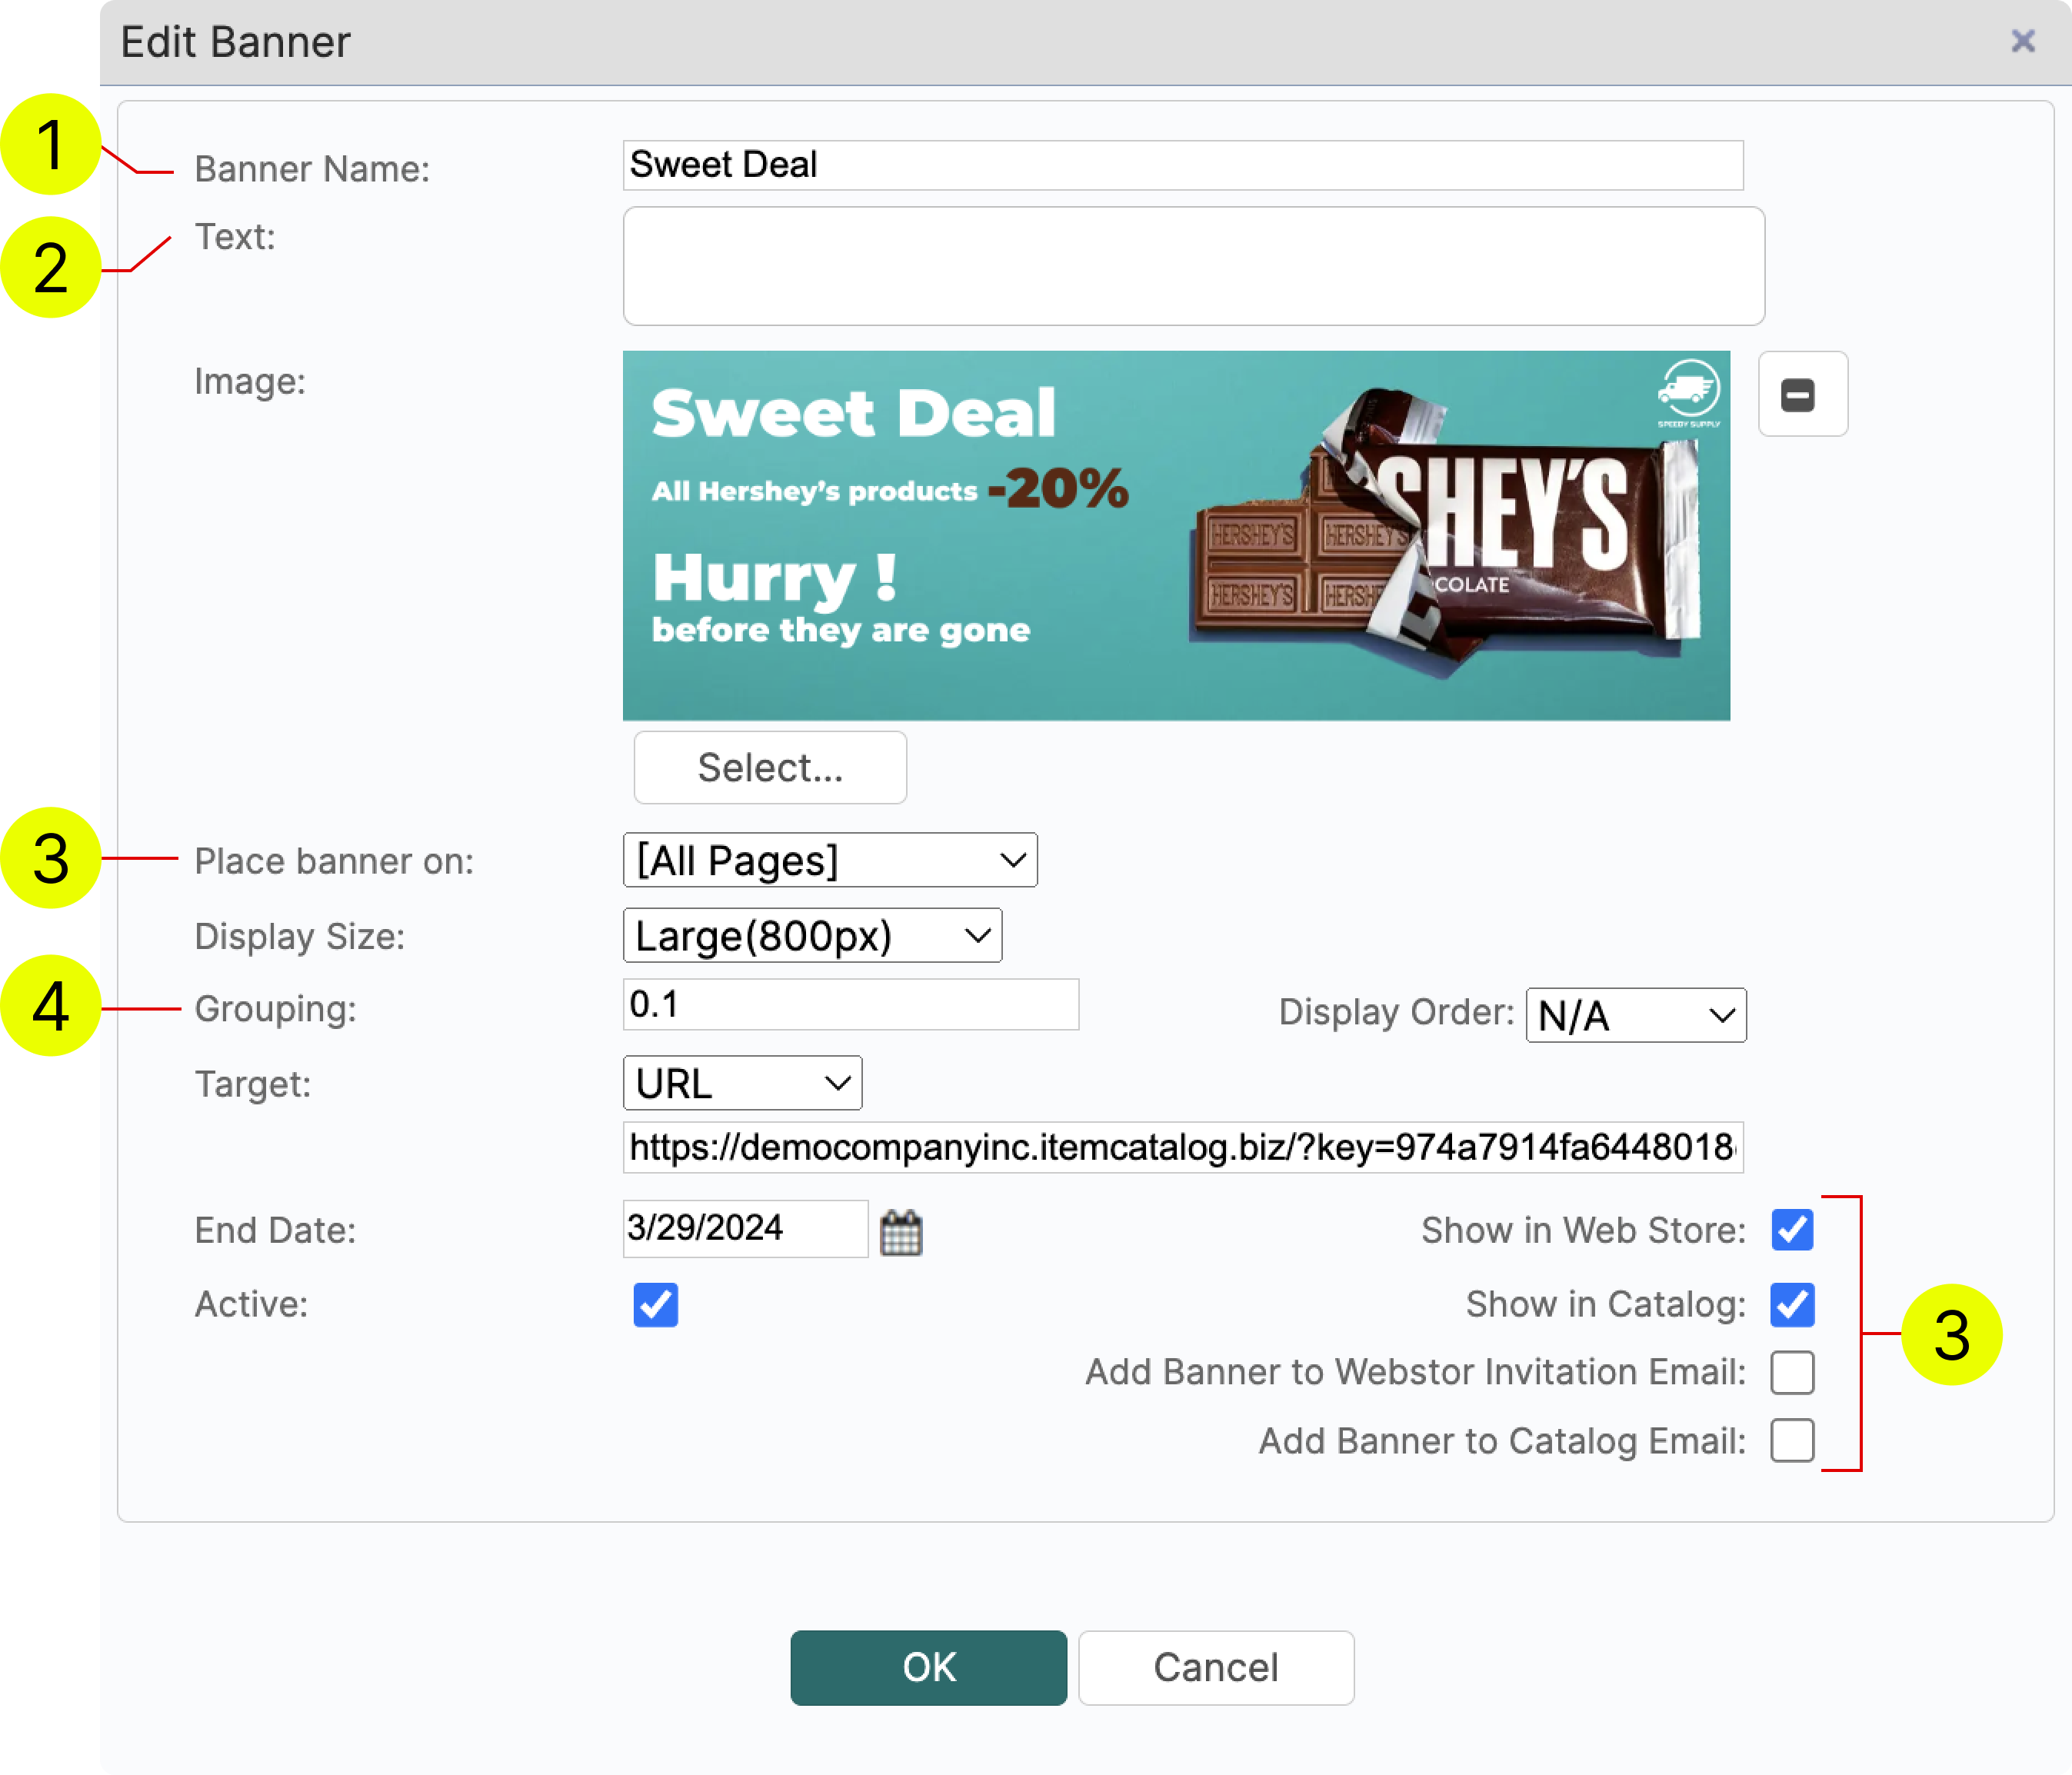
- The name for your banner is only seen by you and is used to keep banners more organized
- This text will only be seen by hovering a cursor over the banner in web store or catalog
- Choose where you want your banner to appear: all pages or only on pages of selected category
- Grouping allows you to alter 2 settings:
4.1. Select the order in which different banners appear on a page (Lowest value appears first)
4.2. Group your banners together (Banners with the same value are placed together)
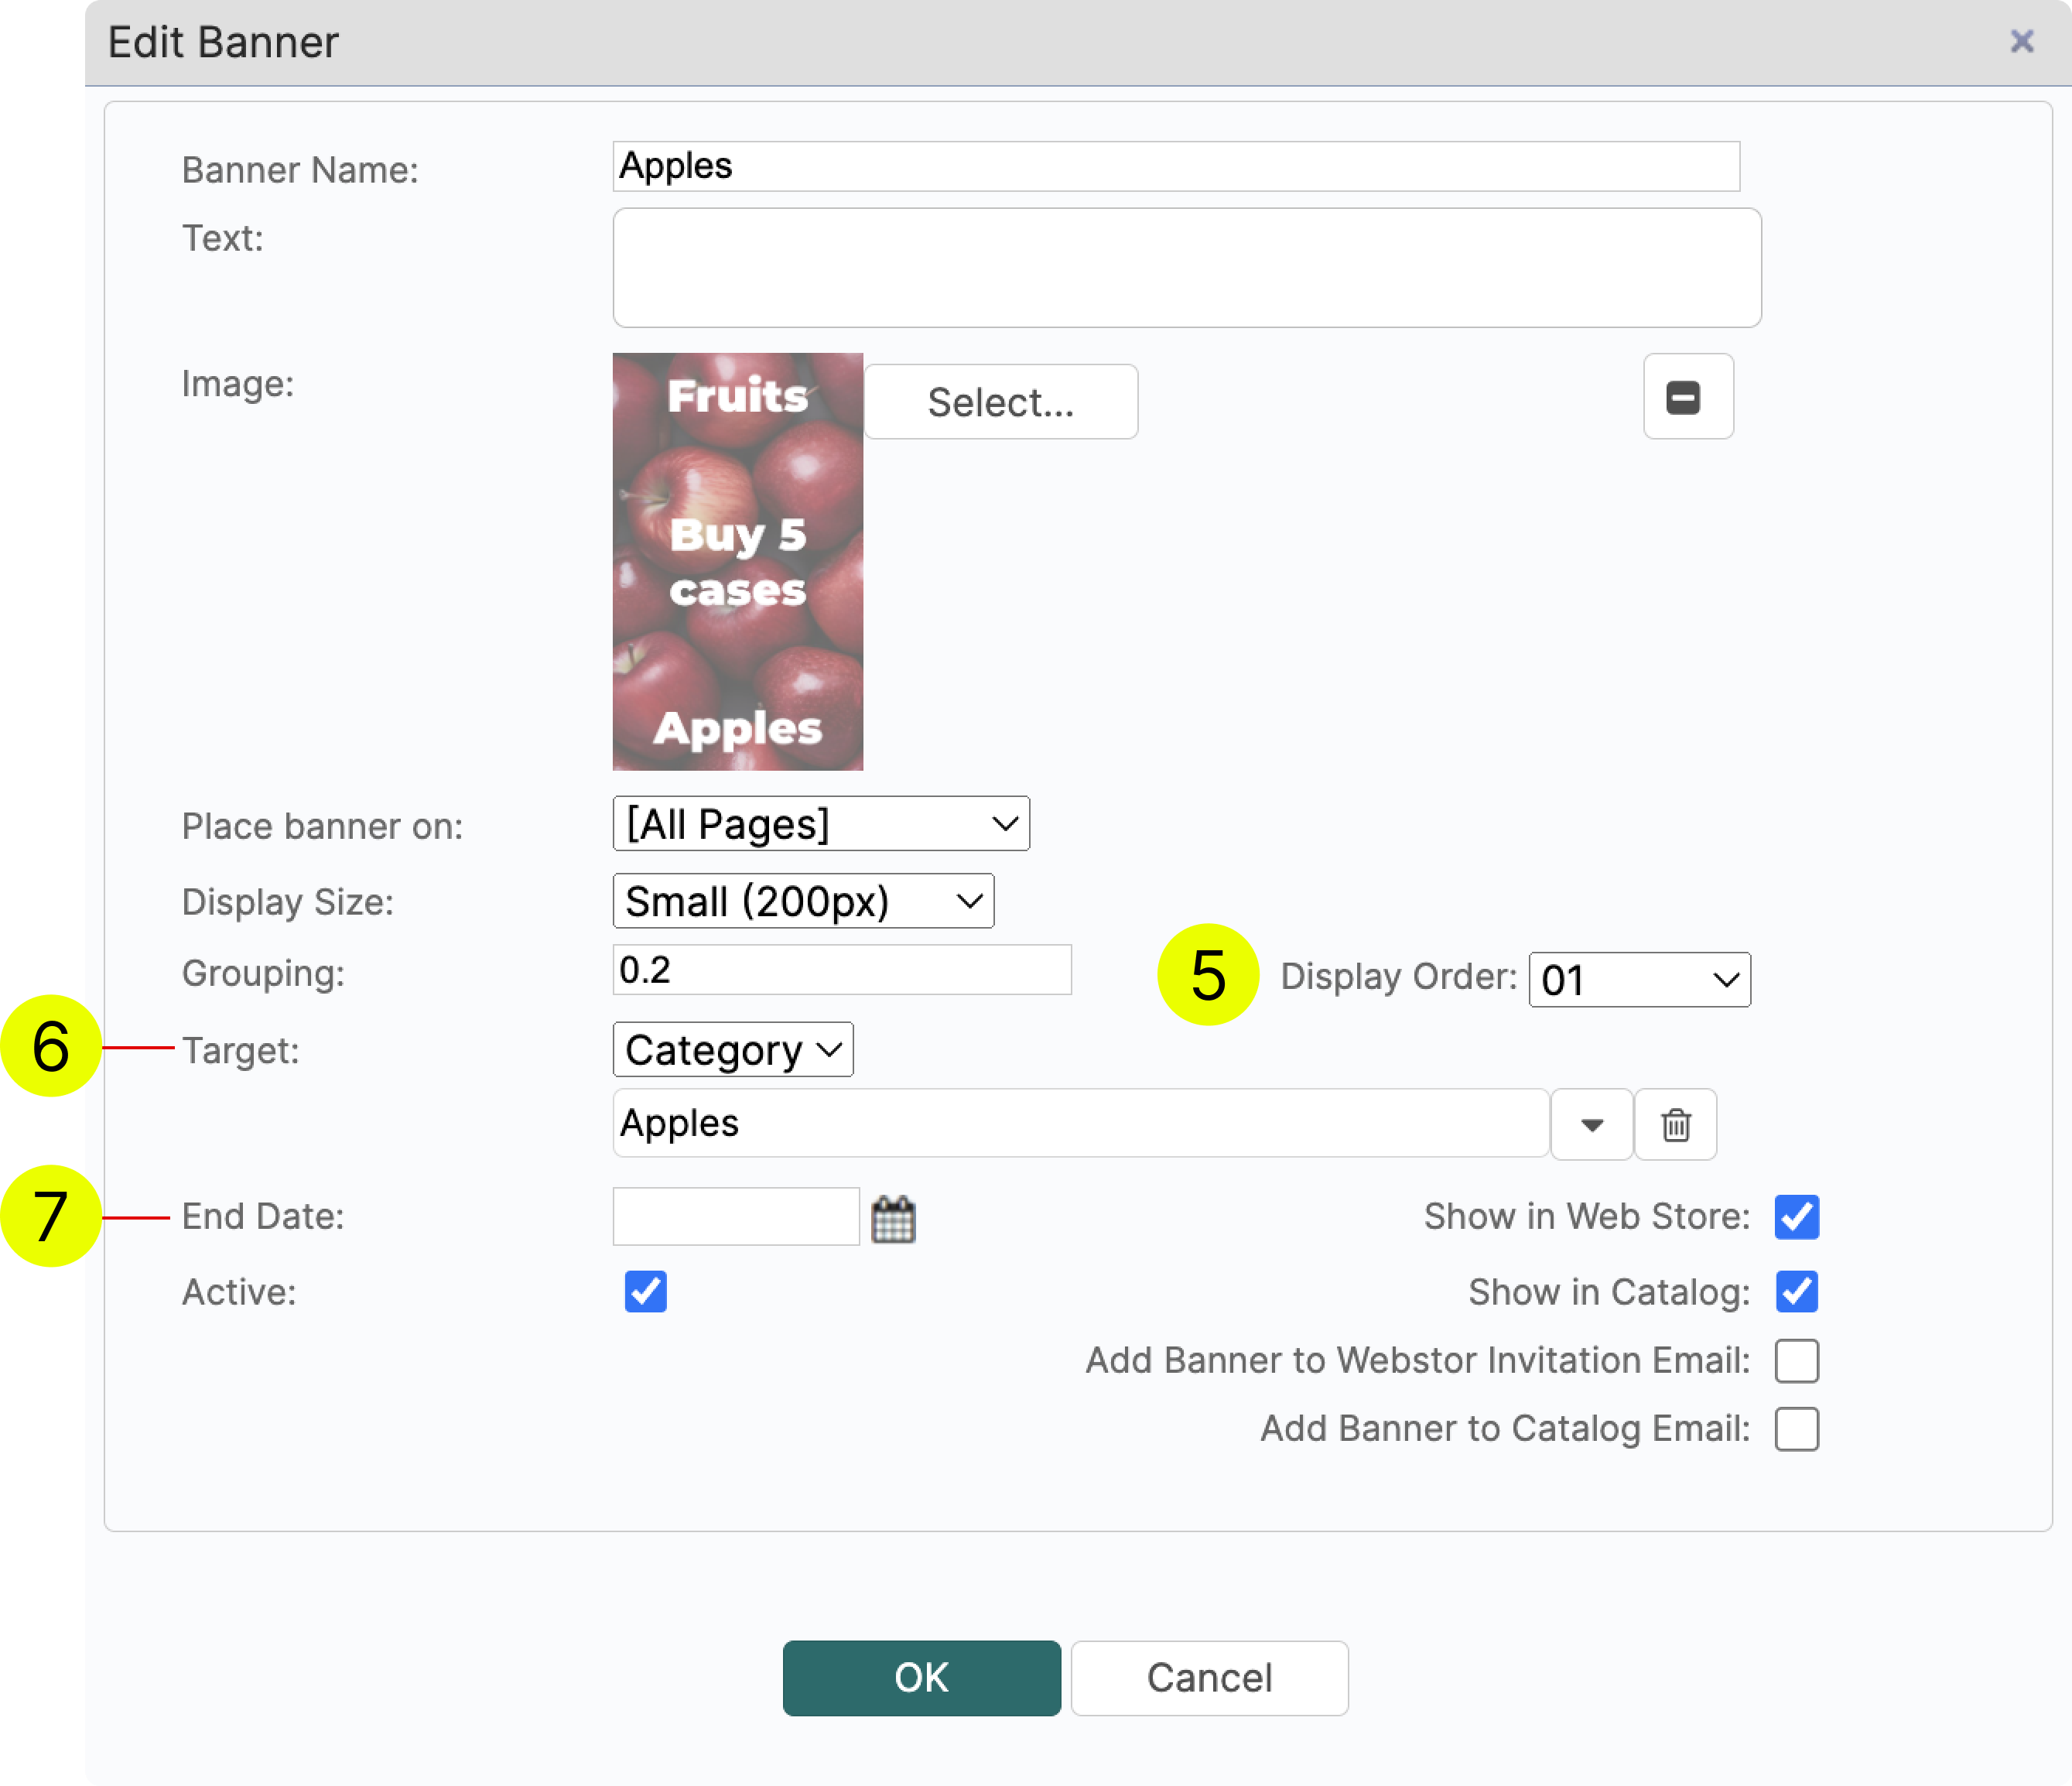
5. Display Order: Allows you to select the order within the group (see example at the bottom)
6. Target:
Category - when clicking on the banner, a customer will be redirected to the assigned category
URL - you can re-direct the customer to any other URL
7. End Date: Your banner will disappear from the customer’s view, but will still be visible to you in Banner Management after the end date.
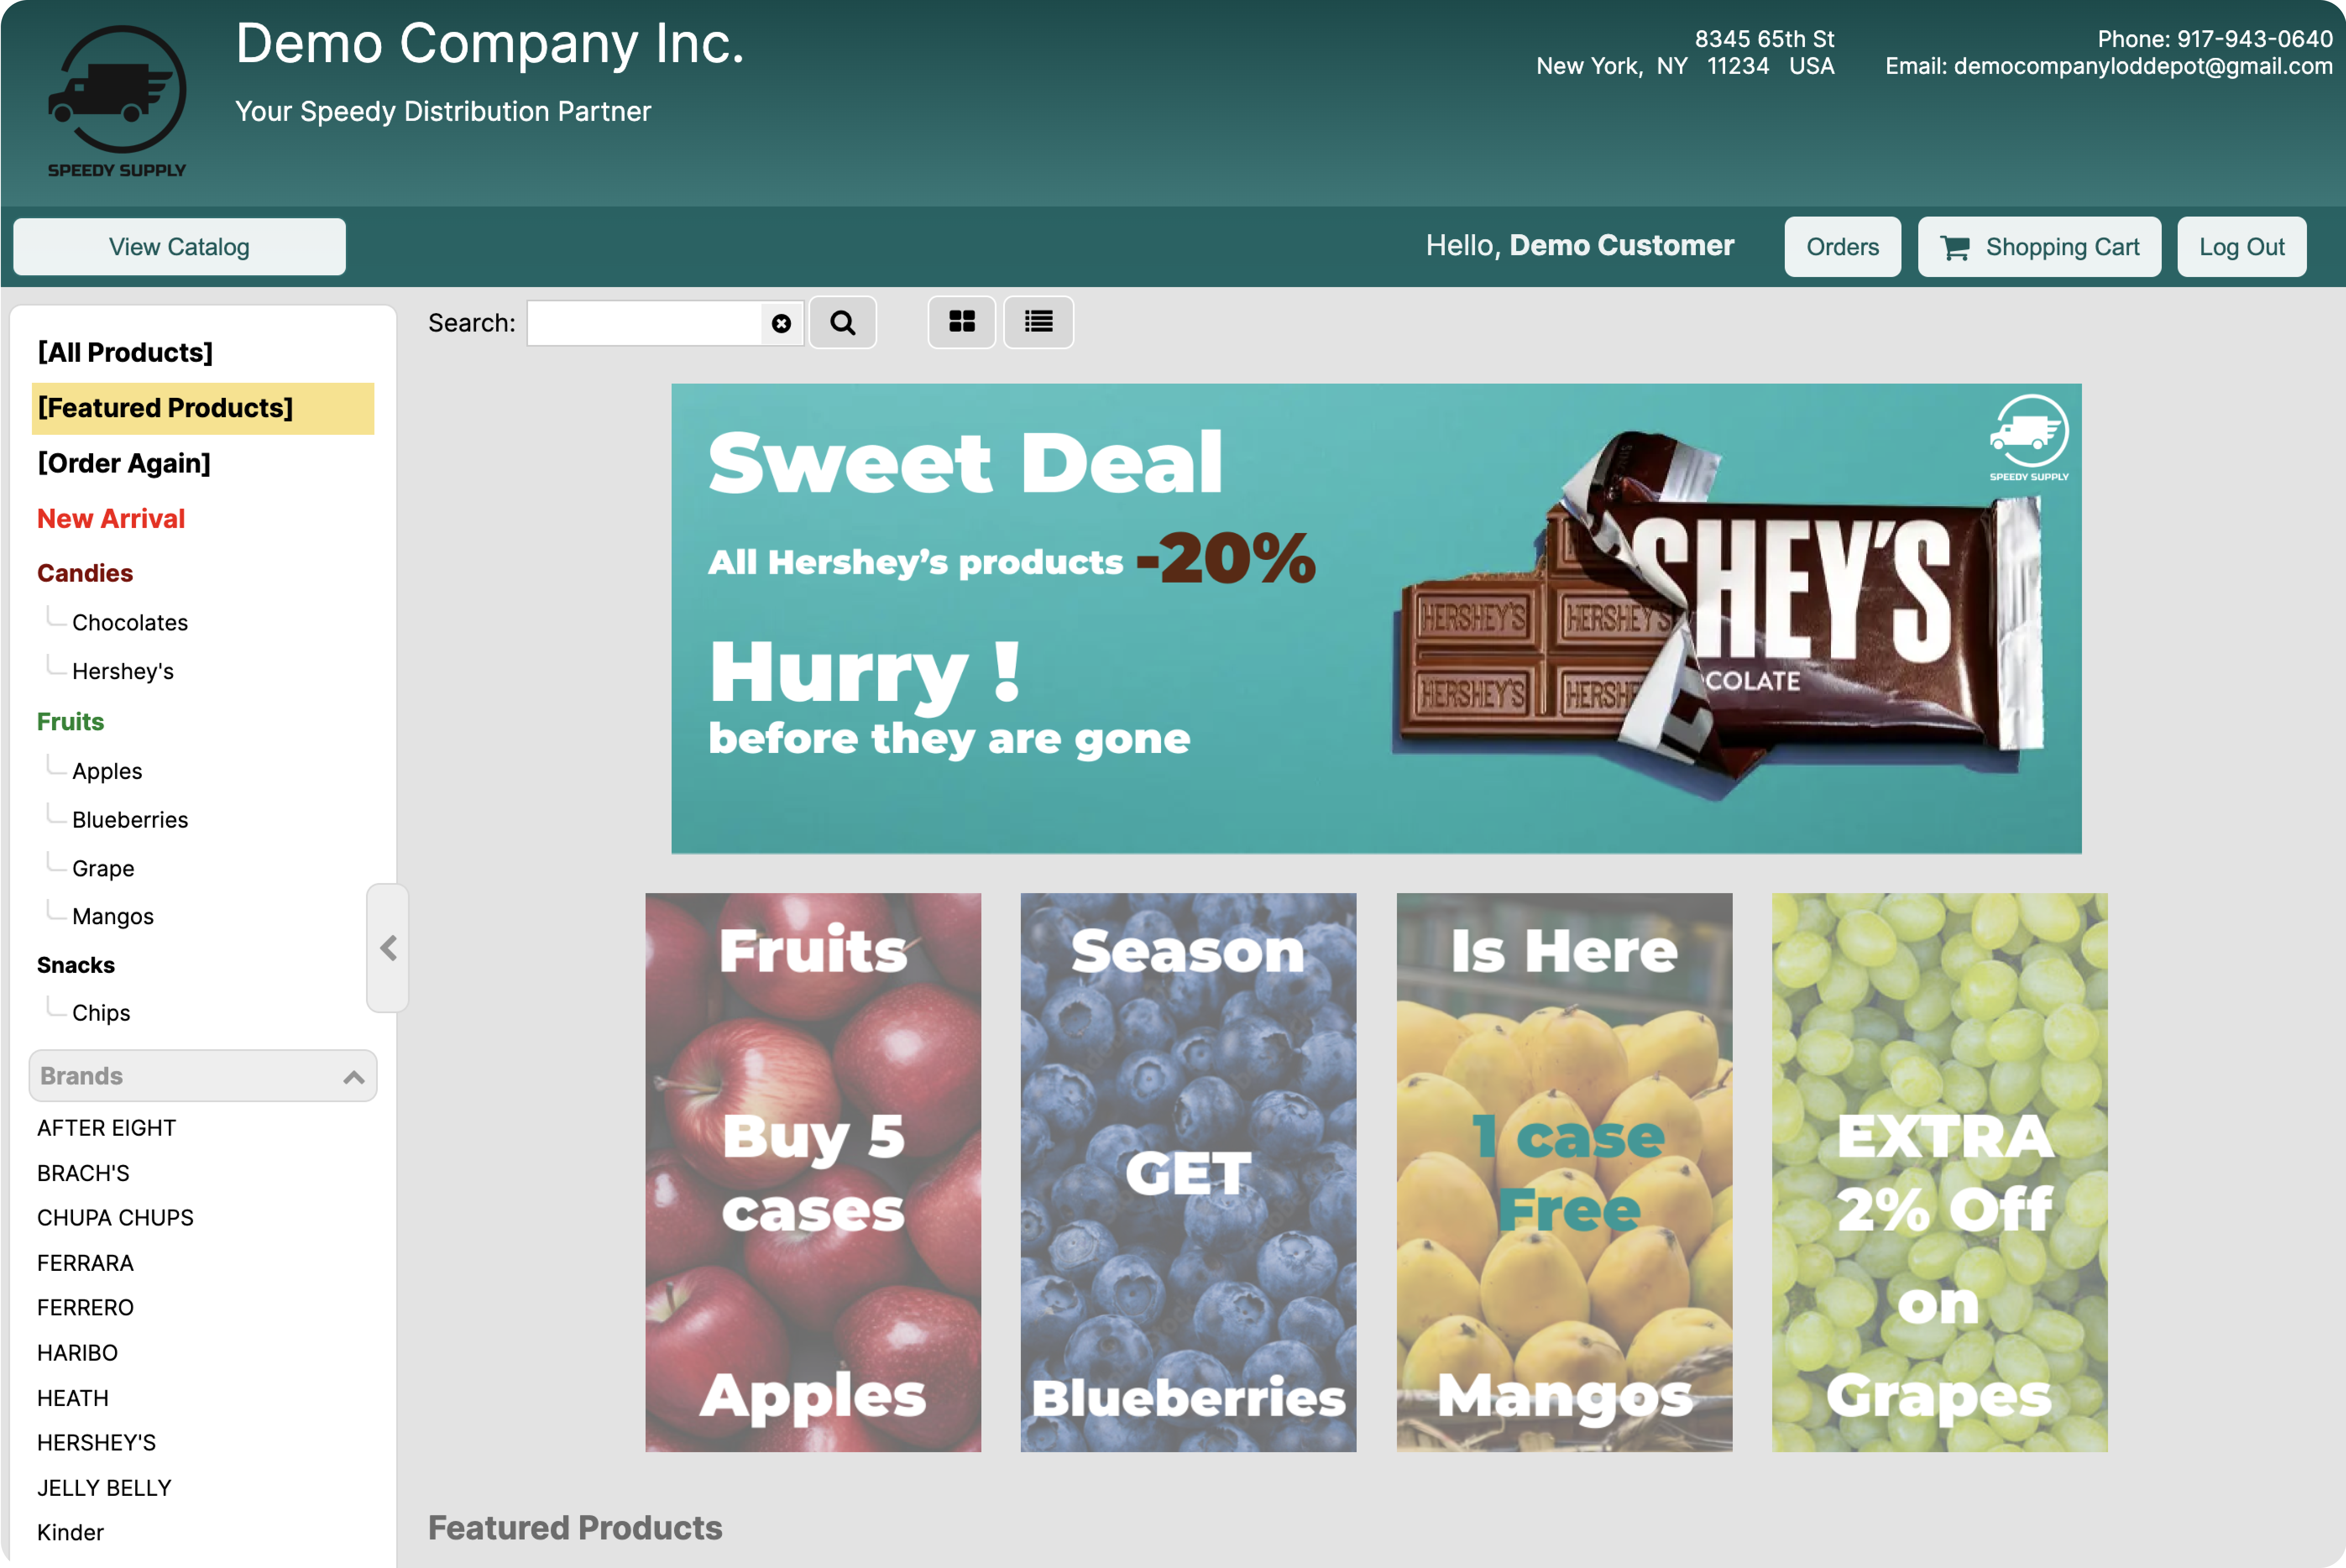
Example:
¶ AI Banner Image Generator
Create polished, on-brand promotional banners in seconds — no Photoshop, no stock-photo hunting.
¶ What it does
Generates a finished marketing banner image from a short text description plus an optional product photo. You can use one of your existing item images (found by name) or upload your own. The generated image is automatically attached to the banner you're editing.
¶ How to use it
- Open or add a banner in Banner Manager and click the AI Image button next to the image preview.
- Fill in the prompt fields:
- Headline — the large text on the banner (e.g. "New Arrival", "Weekend Sale").
- Offer / Price text — short, bold callout (e.g. "$3", "Buy 1 Get 1").
- Product name — what the banner is featuring.
- Style — pick a theme (Best Seller, New Arrival, Sale, Holiday, Generic).
- Orientation — Portrait / Square / Landscape.
- Color scheme (optional) — e.g. "brand blue #0072BD, red & gold".
- Extra instructions (optional) — anything else, e.g. "add jiu jitsu gym background".
- Add a product image (choose one):
- Find item — type a name or description, click Search, click a thumbnail to pick.
- Upload file(s) — pick 1 or 2 product photos from your computer.
- Or leave blank to generate purely from the text prompt.
- Click Generate.
¶ Heads up
- Generation takes about 1–2 minutes — a progress message will appear. Please don't close the window.
- The OK / Cancel buttons on the banner form are disabled while the AI panel is open — click Close on the AI panel when you're done.
- Don't like the result? Tweak the prompt fields and click Generate again — each click produces a new image. The most recent generation is what gets saved.
- The image is auto-attached to the banner. To replace it later, just open the banner and click AI Image again or use the regular Select… upload.
¶ Tips for better results
- Keep the Headline short (2–4 words). Long sentences often get rendered awkwardly.
- Be specific in Extra instructions — "warm autumn background with leaves" beats "nice background".
- For best product accuracy, supply a clean front-facing product photo with a plain or transparent background.
- If text comes out misspelled, regenerate — image models can occasionally misrender letters.