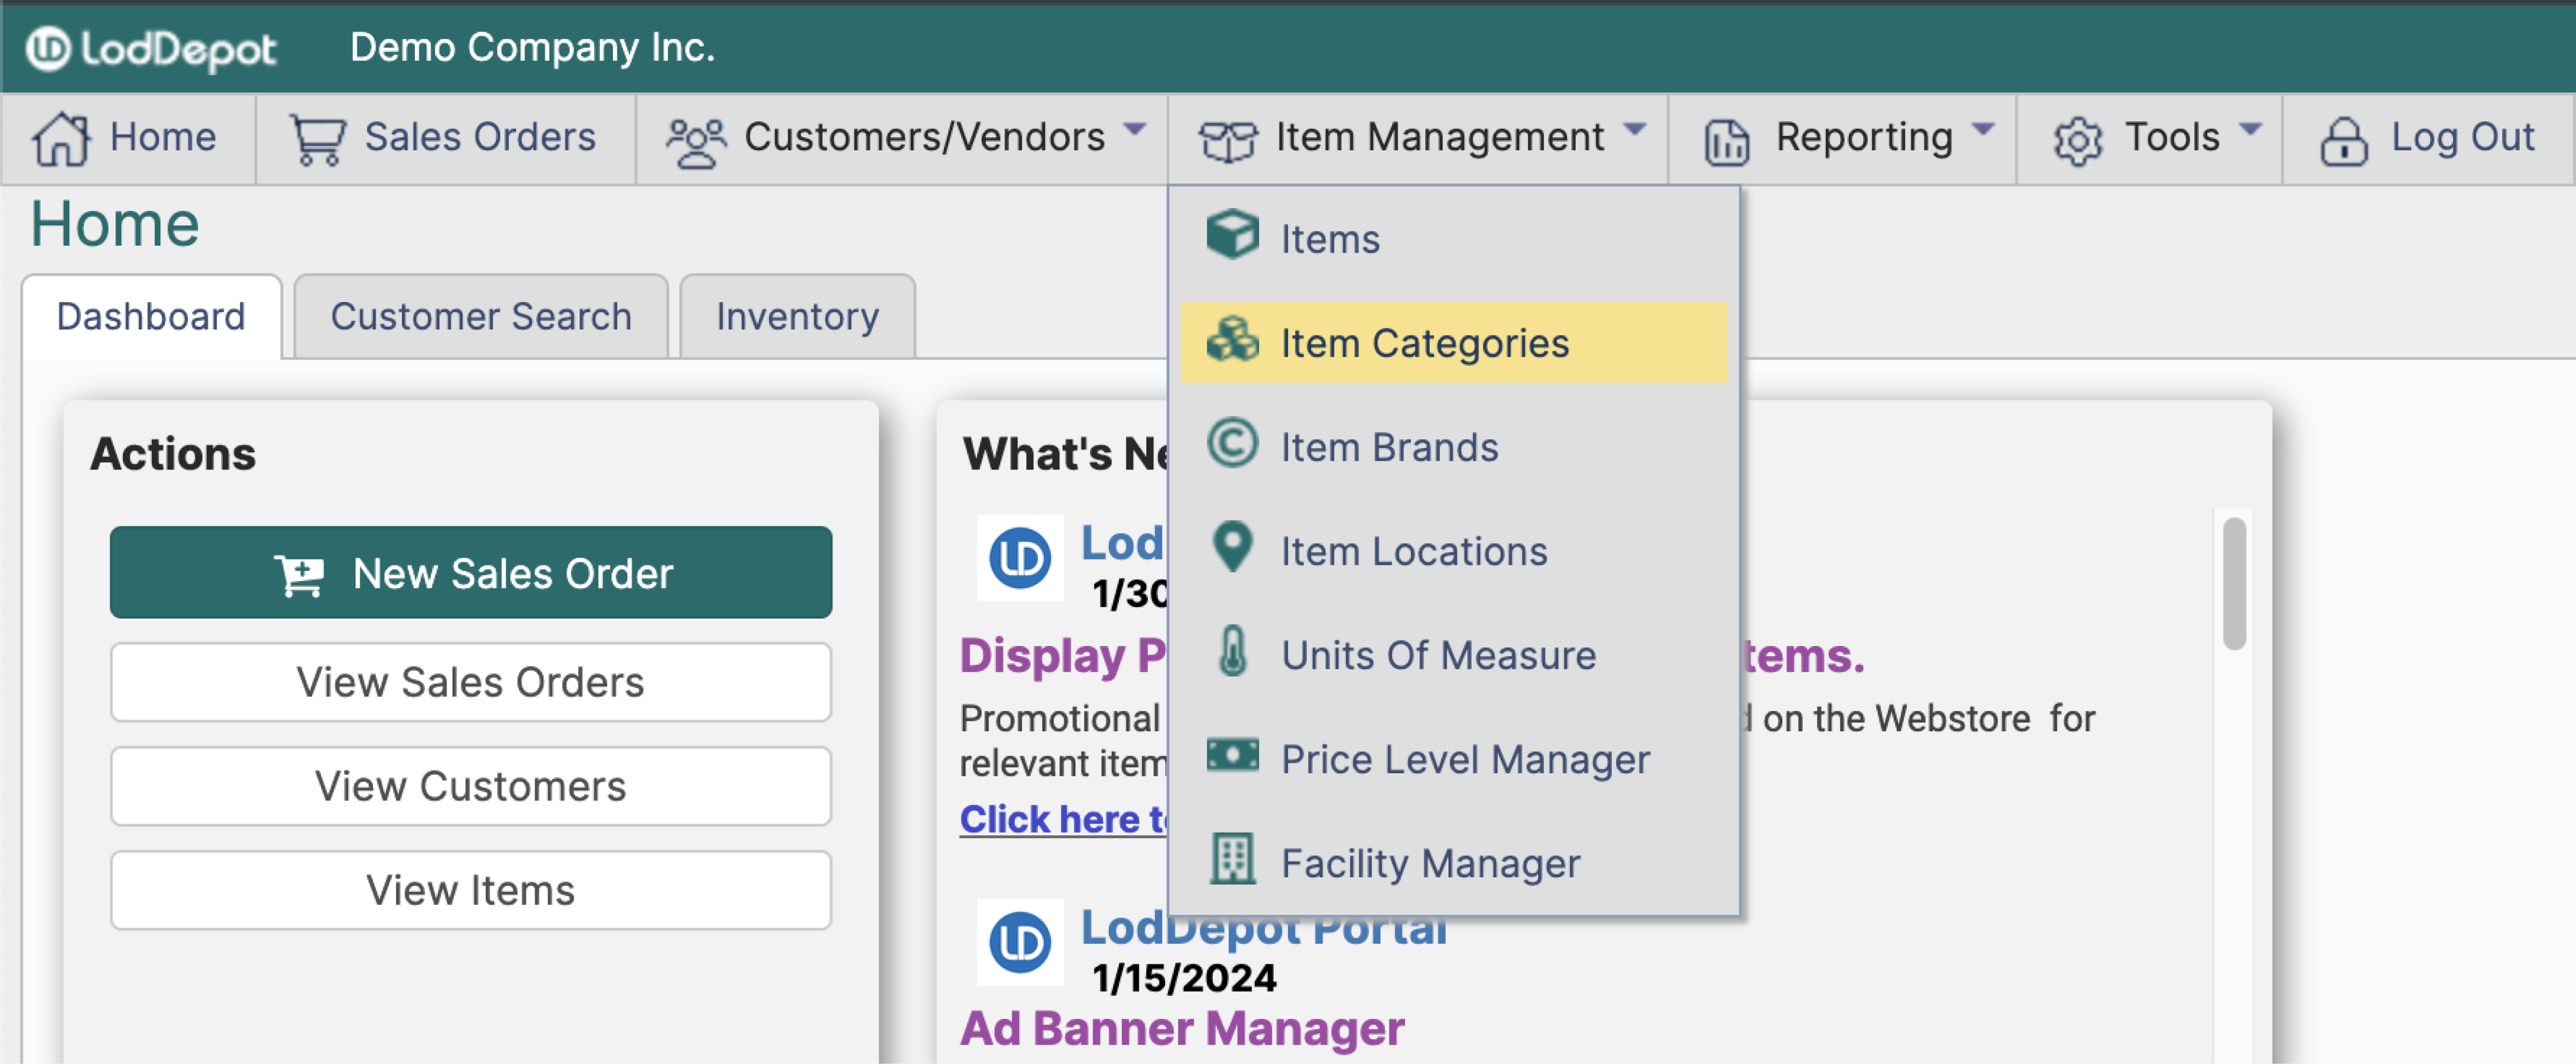
¶ Item Management
https://www.youtube.com/watch?v=F7YlKezhPVw
¶ Overview of the User interface and introduction to LodDepot
LodDepot offers comprehensive item management solutions, ensuring smooth operations for distributors and sellers. This page will help users to get started with their inventory and start building the catalog.
¶ Create a New Category
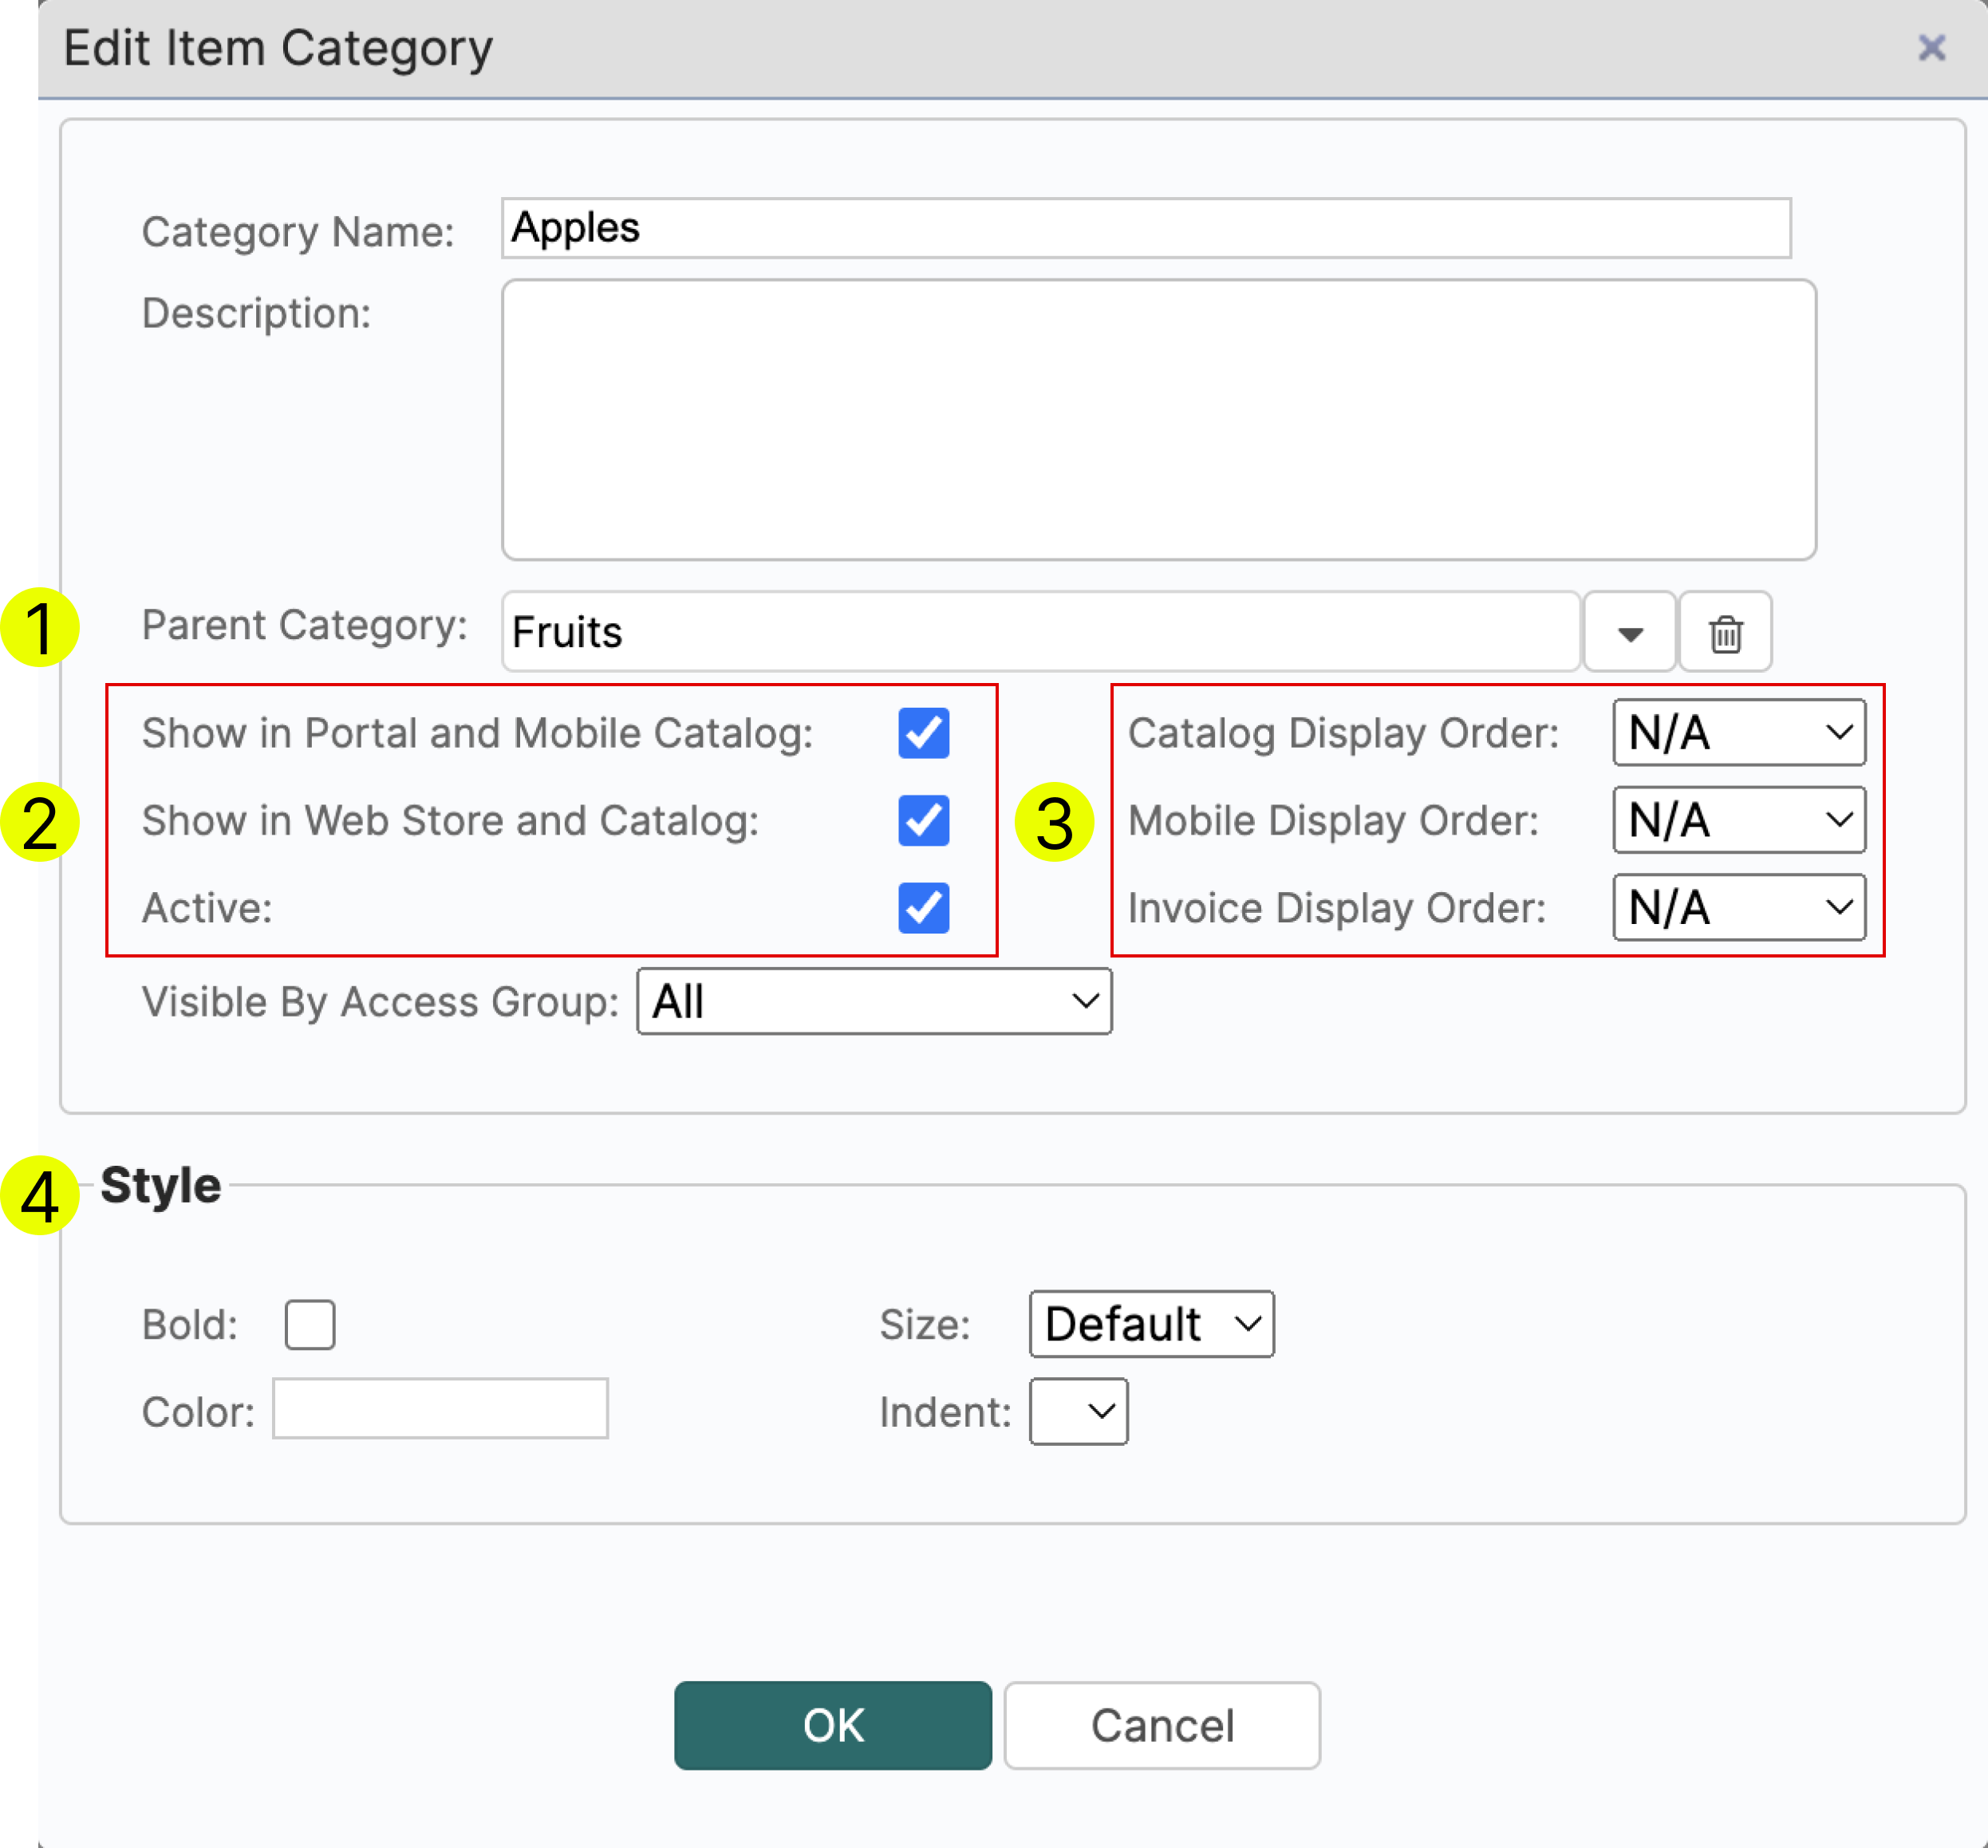
For a more efficient item management, it is important to first create a category for your items.
- Select a parent category if you are creating a sub-category
- Manage the visibility of the category by toggling some of the features on or off.
- These fields will help you manage the order of your categories within the user suite, the catalog and invoices.
- Apply styles to categories to make your catalog easier to navigate.
¶ Create a New Item (for accounts without Quickbooks or other ERP integration)
Now that we have set up our categories. It's time to start populating them with items. Under the Item Management tab, navigate to Items and click Add Item.
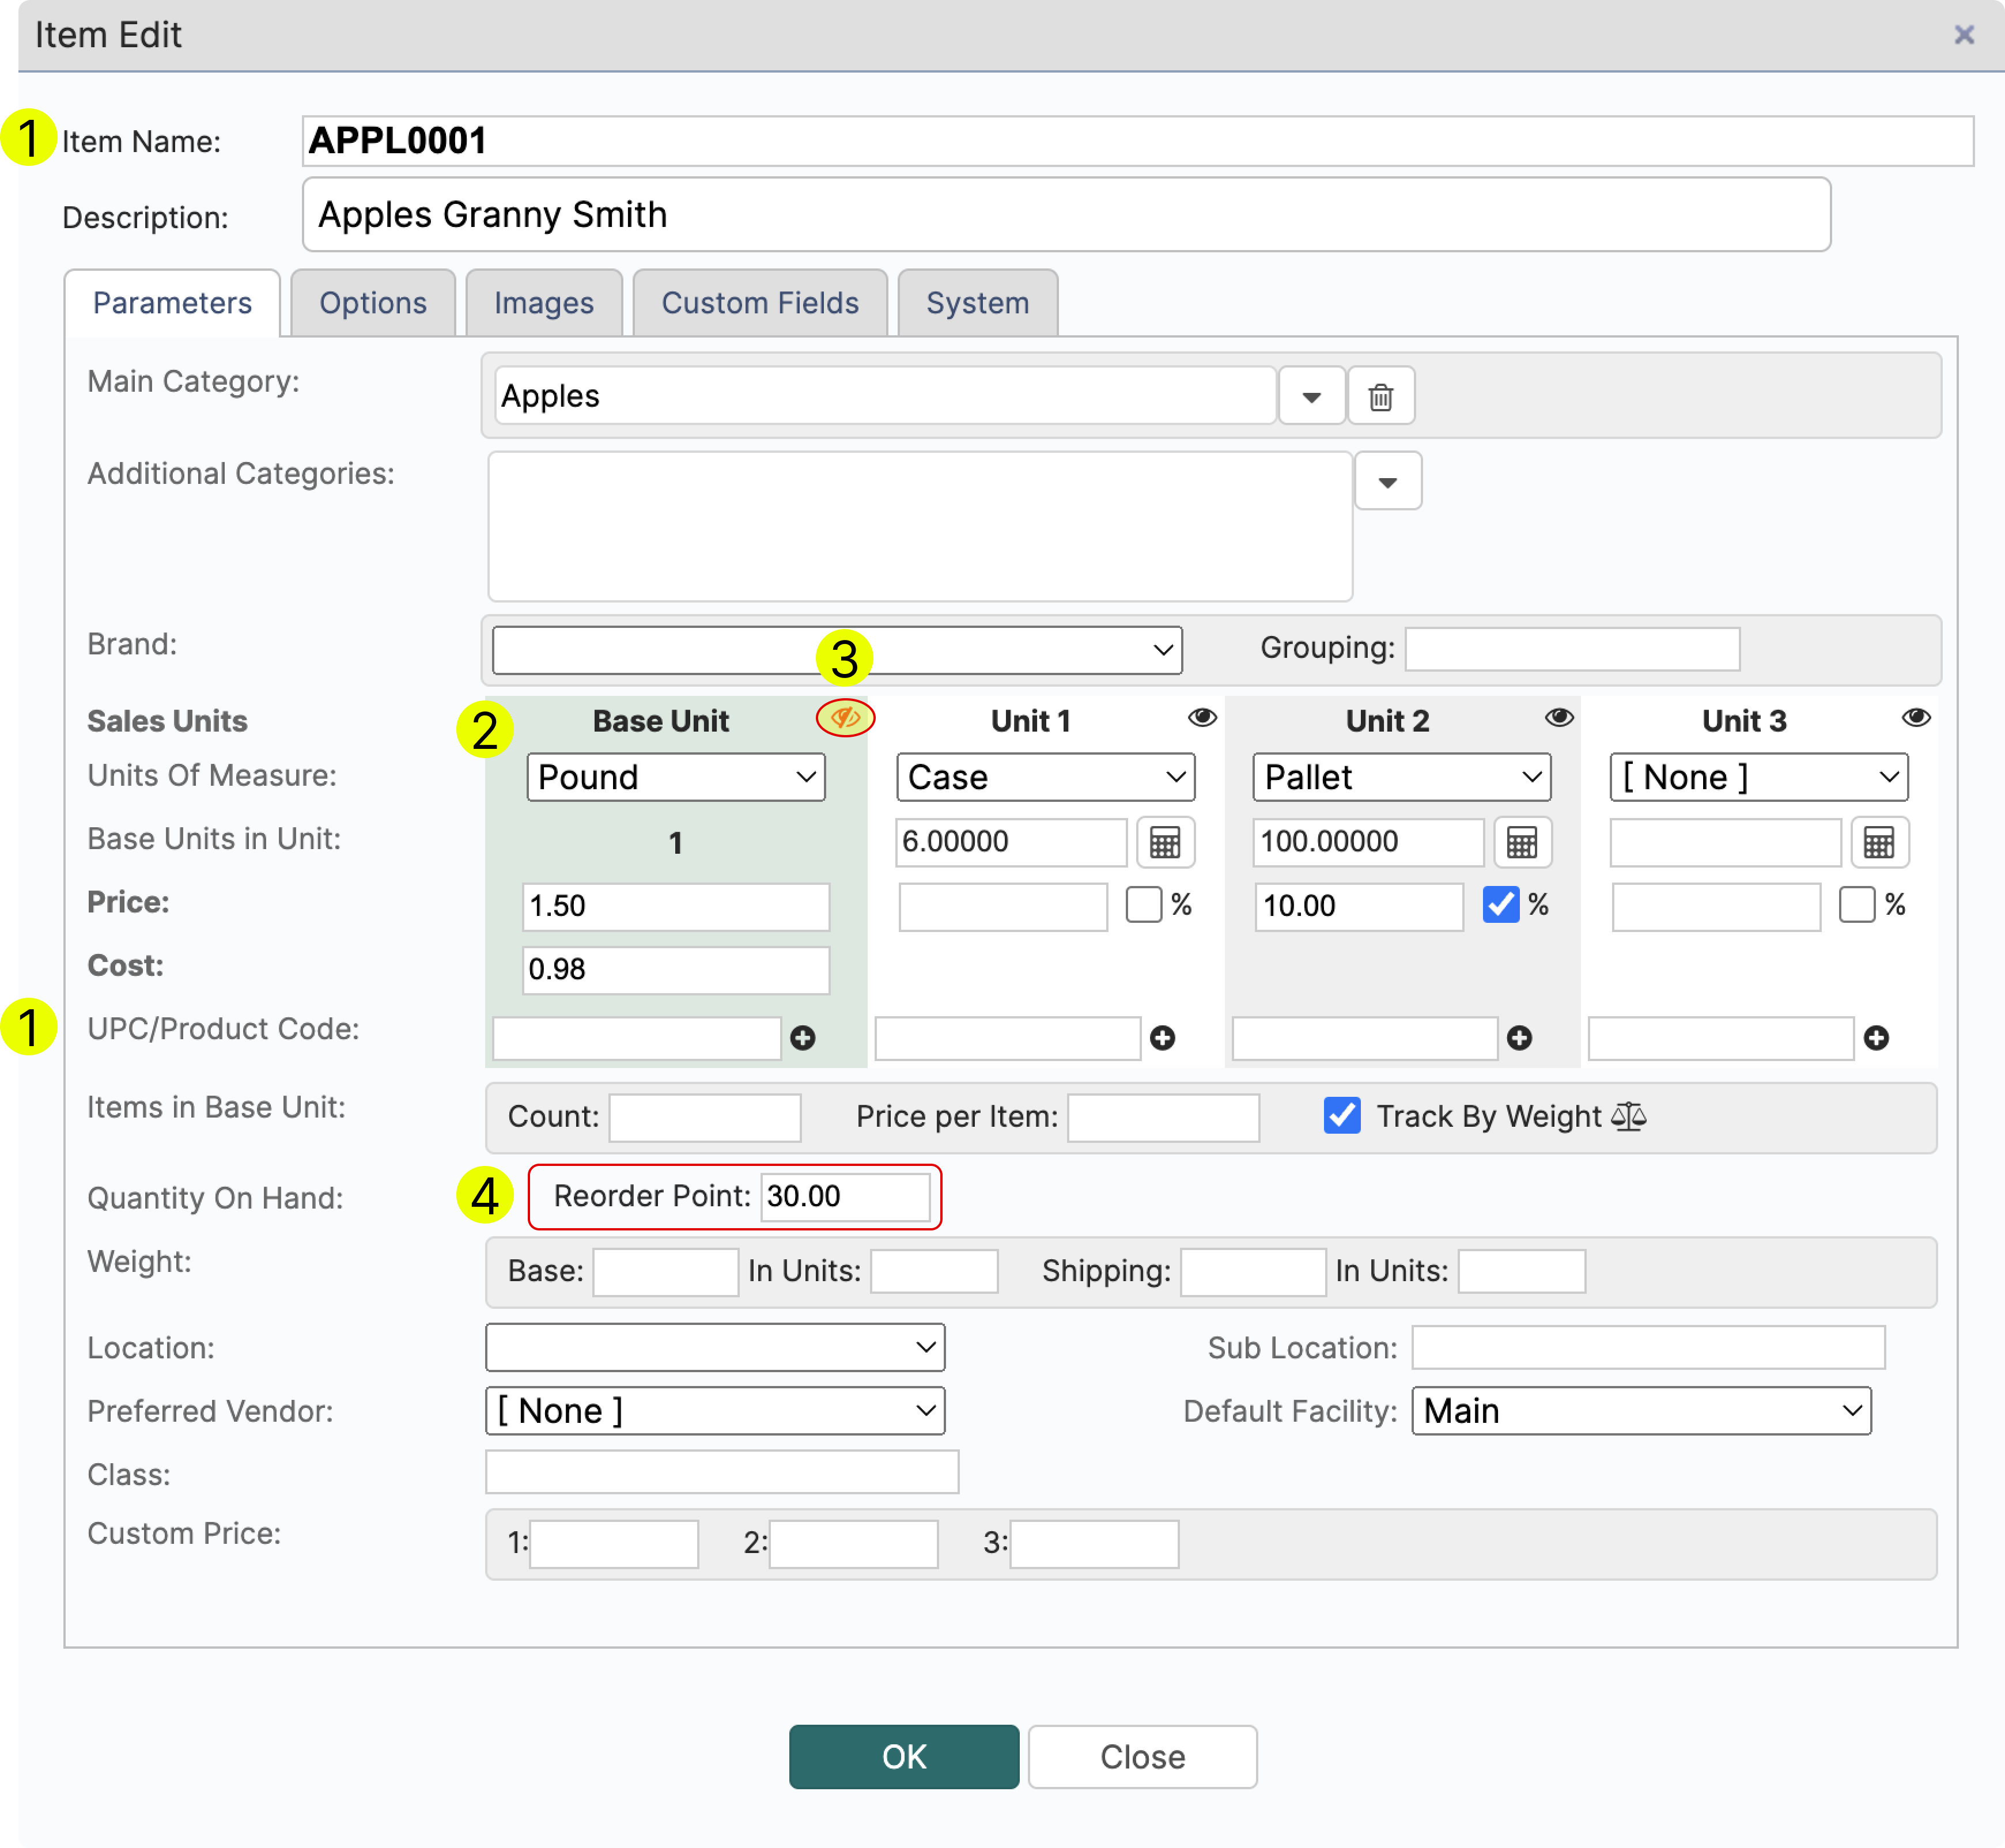
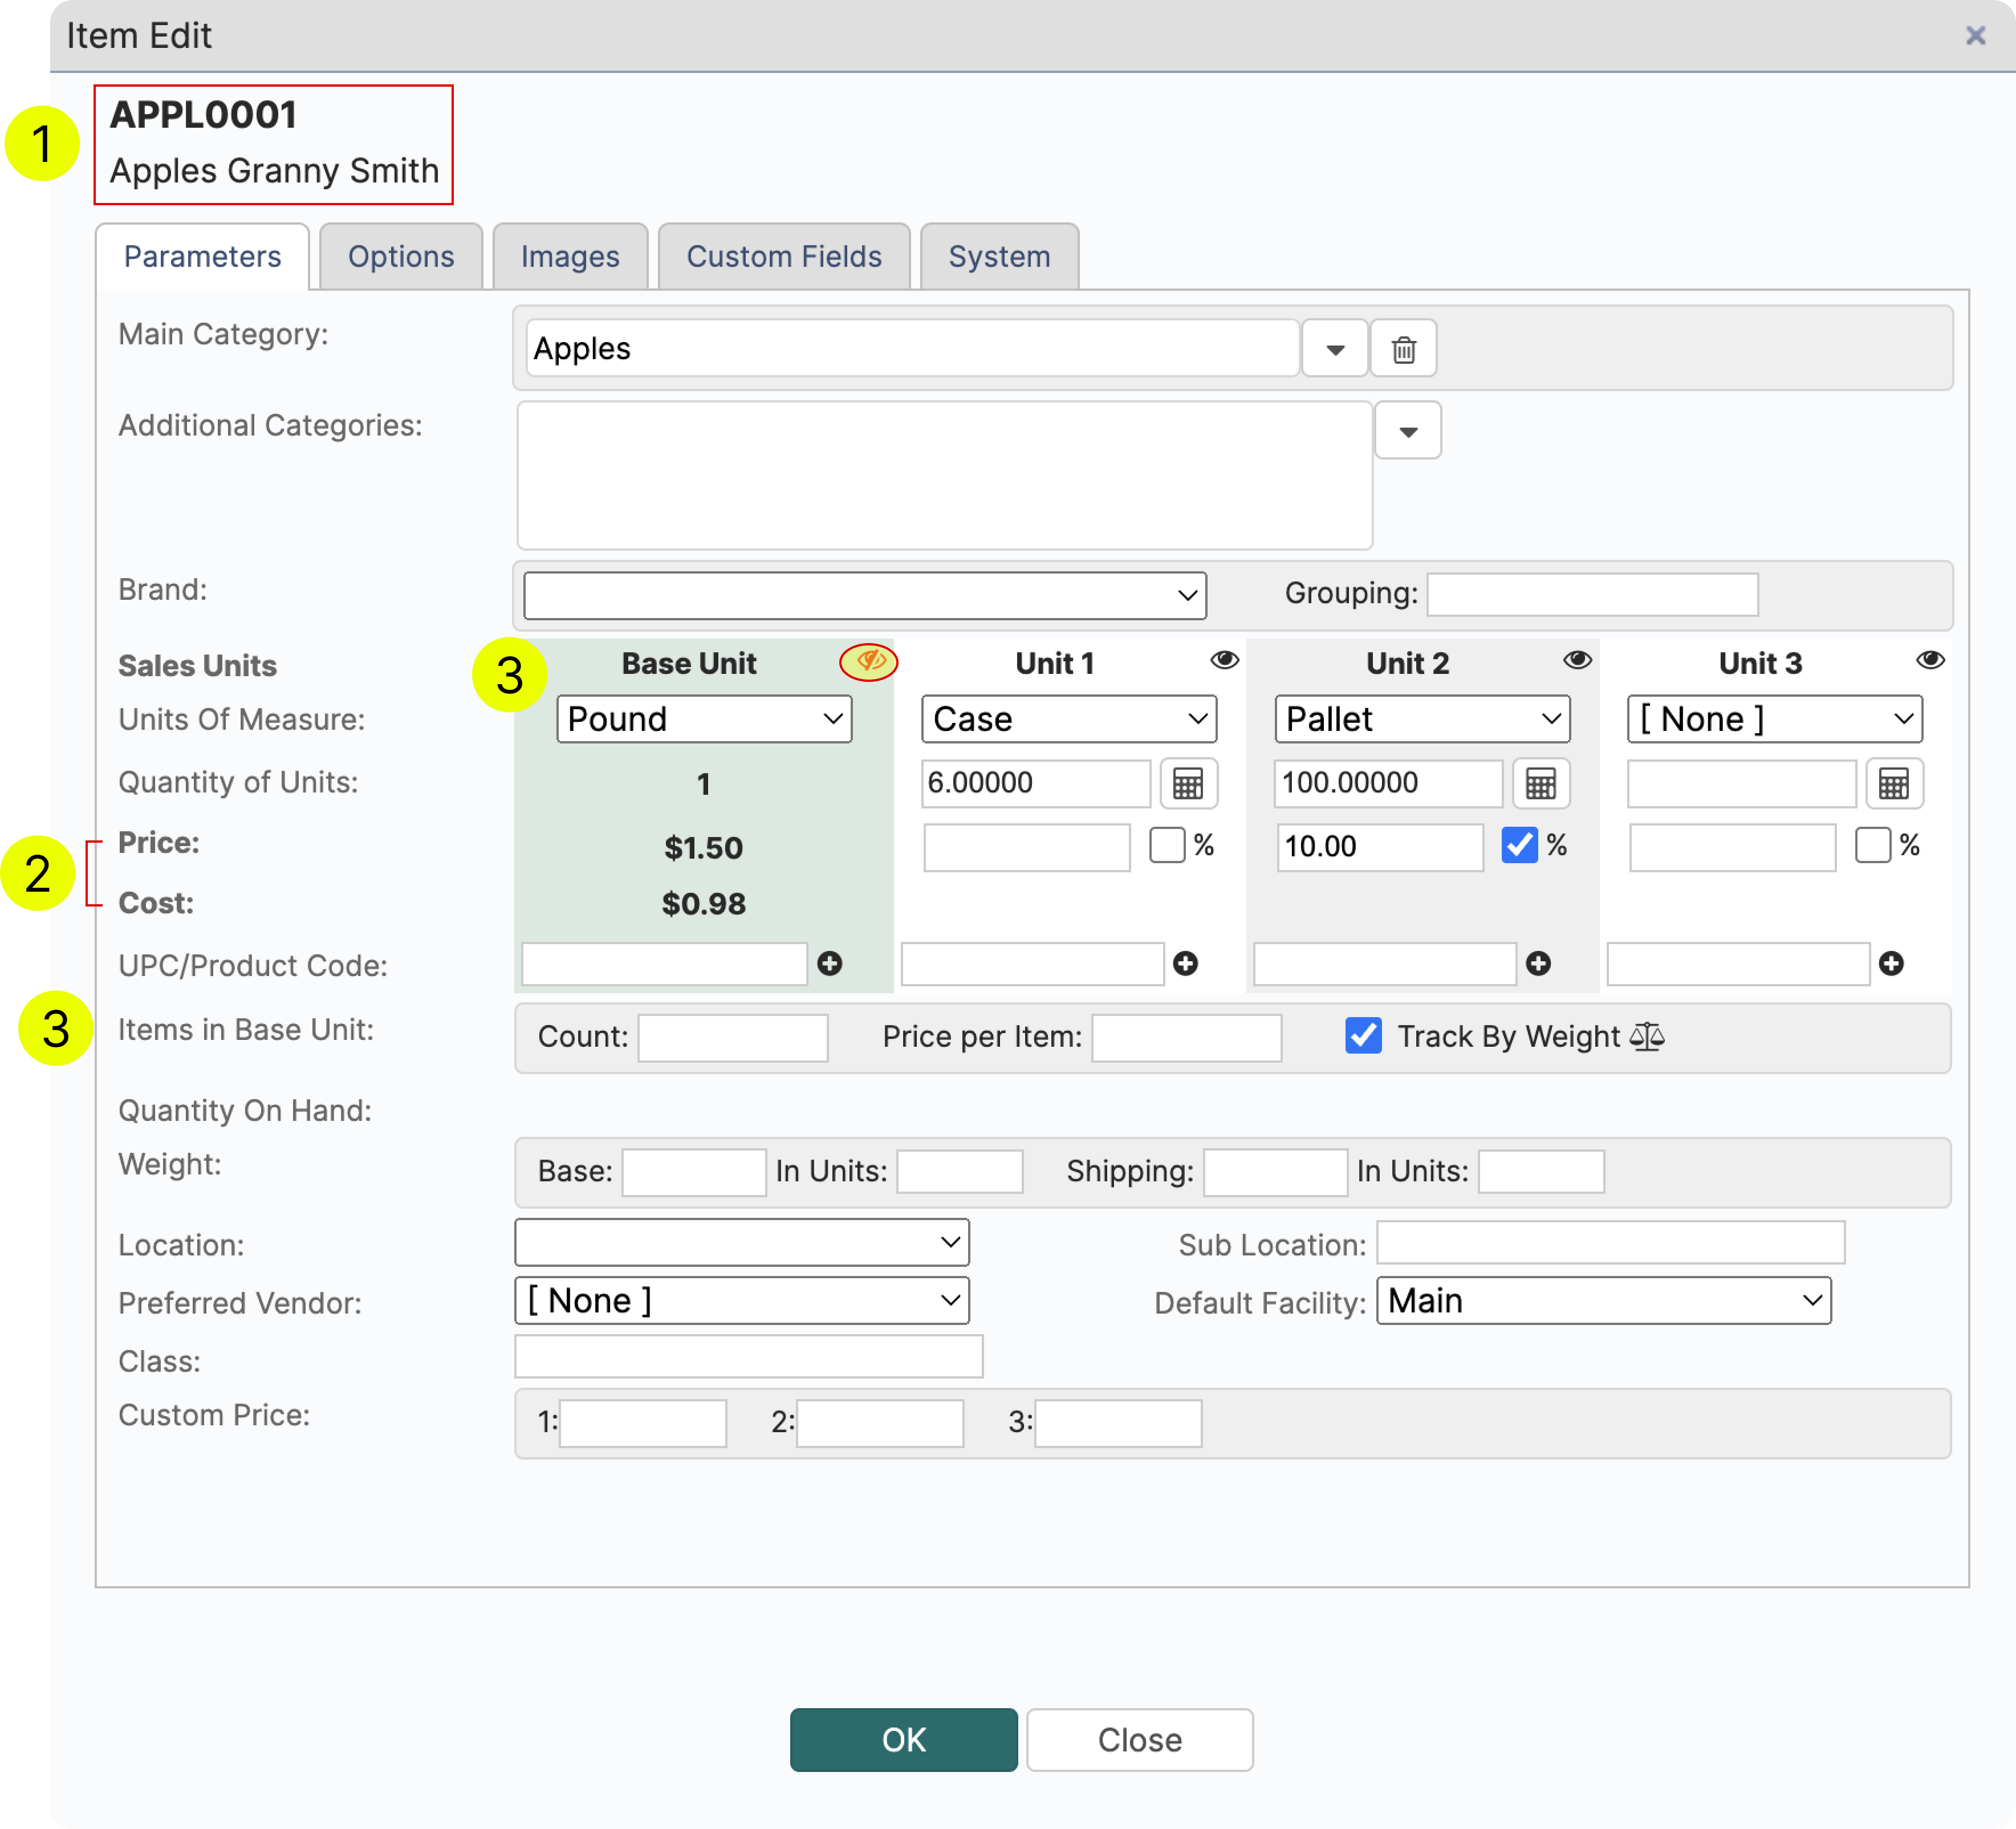
- Enter UPC or create your personal short item name for easy search and classification. However, you can have both, your personal item name and UPC be displayed at the same time.
- Select a base unit in which you would like to track your inventory. When running inventory reports, the QTY on Hand will be displayed in these units.
- LodDepot lets you control what units are visible to the customers in catalog and web-stores.
- Reorder points help you track your inventory levels. LodDepot will notify you when you are running low.
¶ Create a New Item (for accounts with Quickbooks or other ERP integration)
Now that we have set up our categories. It's time to start populating them with items. Under the Item Management tab, navigate to Items and click Add Item.
- Item Name and Description will be synced and managed through your ERP.
- Price & Cost will also be synced with your ERP. Make sure that both price and cost correspond to the base unit selected.
- Base Unit Select a base unit in which you would like to track your inventory. When running inventory reports, the QTY on Hand will be displayed in these units.
If a base unit contains more than one item, indicate the amount of items included in the base unit.
e.g. If your base unit is a Case, which includes 10 items, than enter 10.
¶ Grouping Items Inside a Category
Use the Grouping field to keep related items together and to control the order in which they appear inside a category.
- Under the Item Management tab, navigate to Items, open the item and enter a value in the Grouping field (next to Brand). To set the same value for many items at once, select them and use the multiple items edit.
- Grouping is a free form field: you can type any text or number, for example 01, 02 or A-Snacks.
- When items of a category have a grouping, items with the same grouping value stay together, and the groups are ordered by their grouping value alphanumerically (A to Z, 0 to 9).
- Example: a category has 5 items with grouping 01 and 4 items with grouping 02. The 5 items with 01 are shown first, followed by the 4 items with 02.
- Tip: values are compared as text, so use leading zeros (01, 02 ... 10) to keep numbered groups in the right order. Without them, 10 would be placed before 2.
¶ Item Units
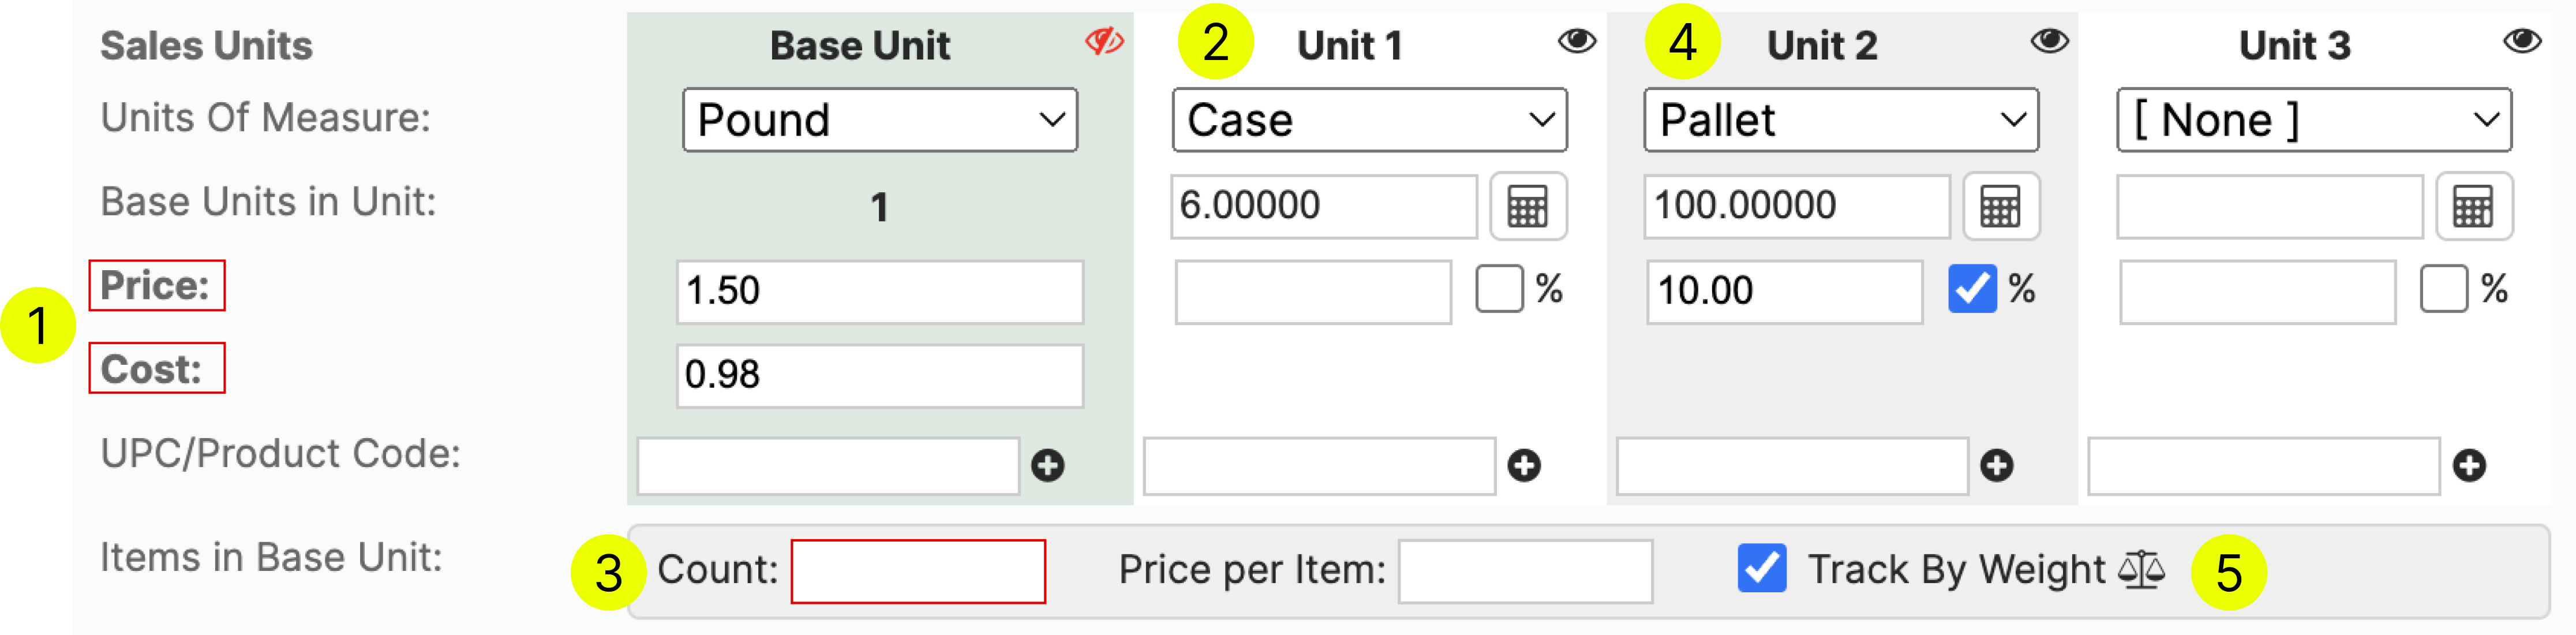
- By setting the price of the base unit, the price of all other units will be recalculated automatically. Cost and price must be related to the base unit.
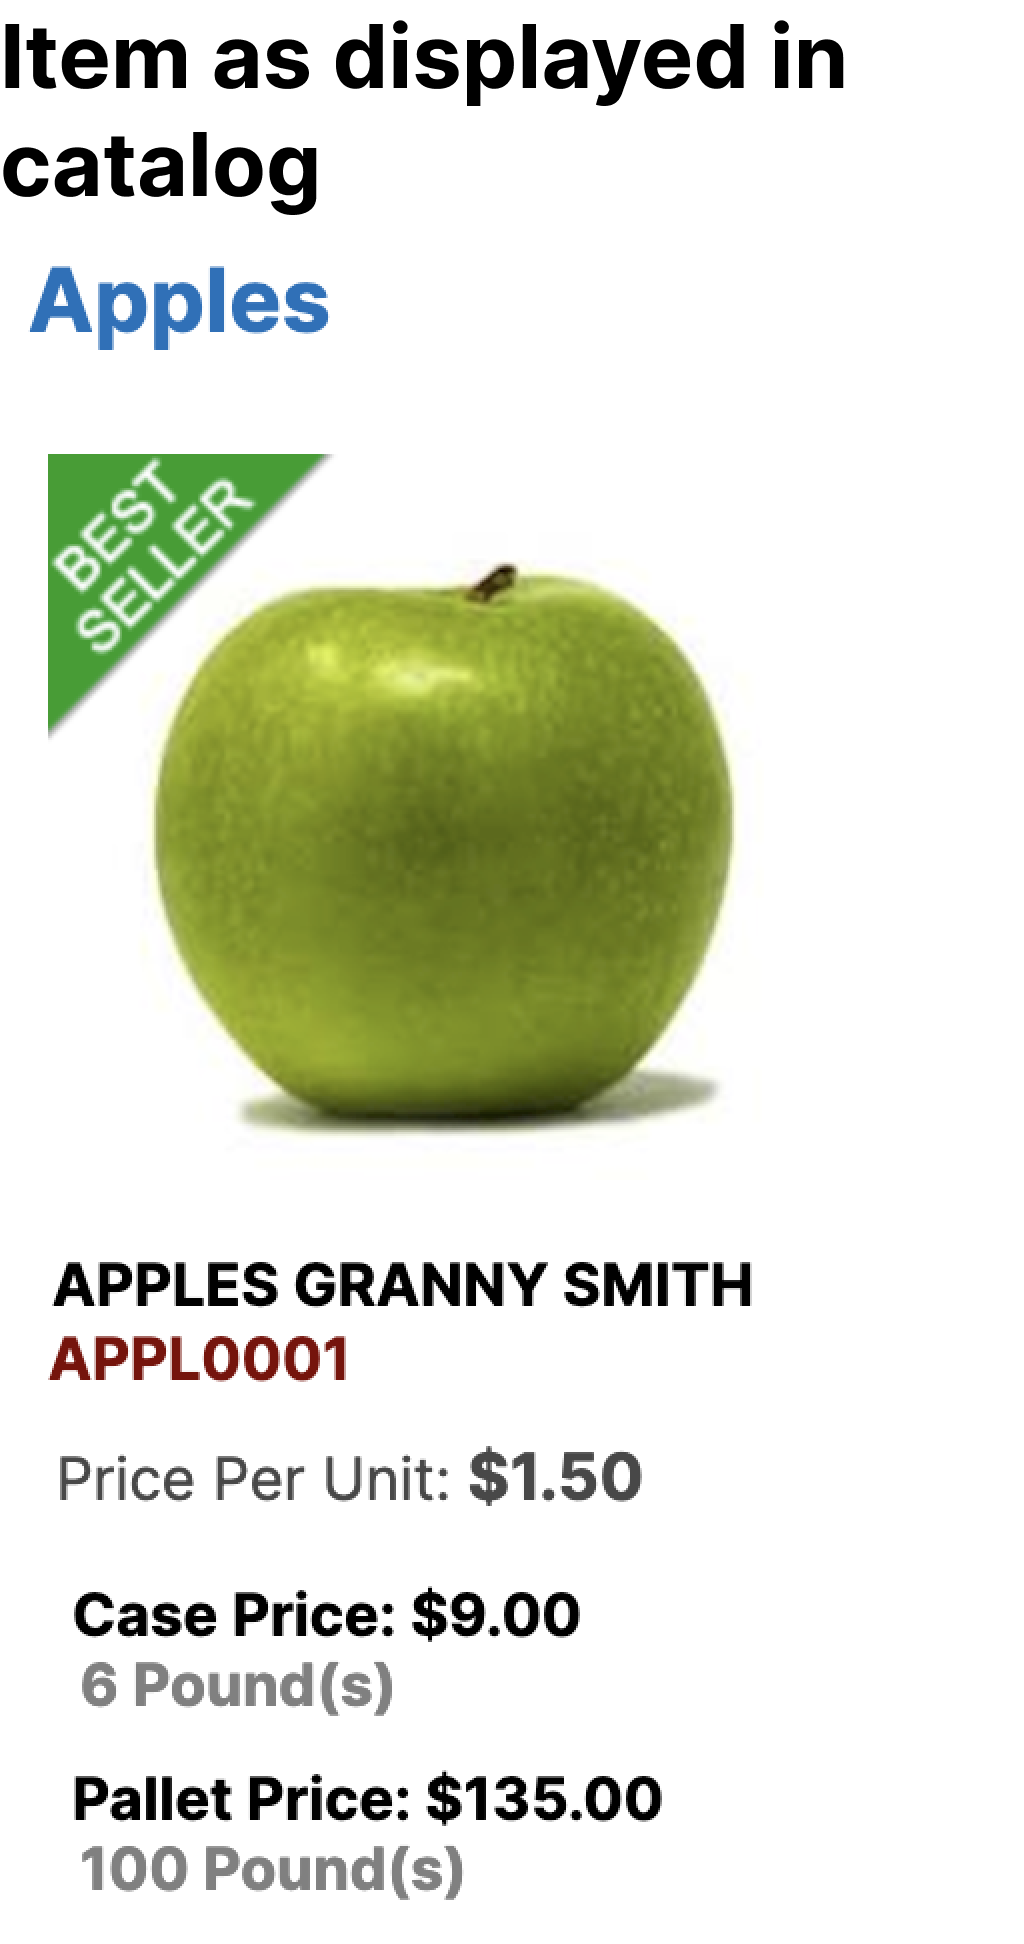
- UNIT 1: Case By leaving the Price field, for our unit 1, empty, price of the case automatically got calculated based on pounds/case.
- If a base unit contains more than one item, indicate the amount of items included in the base unit.
e.g. If your base unit is a Case, which includes 10 items, than enter 10. - UNIT 2: Pallet
In this unit we opted to give our customers a discount of 10% for purchasing this unit.
We could also set a fixed price for this particular unit, by unchecking the % box and entering the price. - When your unit is represented by variable weight, then you indicate this by selecting this checkbox.
¶ Item Packaging (shipping dimensions, volume and weight)
Each unit of measure of an item (for example Each, Case and Pallet) can have its own shipping packaging: dimensions, volume, gross shipping weight and stacking. LodDepot uses it for the weight and volume totals on invoices, pick tickets, packing lists and delivery slips.
- Packaging button
In Edit Item, click Packaging on the Weight line. Pick the unit in the Unit list and enter its Dimensions L/W/H, Volume and Weight, each with its unit, and whether it is Stackable with the Max Stack. Leave Volume empty to calculate it from the dimensions. Switch units in the Unit list to enter the packaging of each unit, click OK and save the item: the packaging is saved together with the item. The base unit packaging is shown next to the Packaging button. - Packaging tab
The Packaging tab of the item lists every unit with its dimensions, volume, weight and where the values come from, and lets you edit or clear the packaging of a unit. - Units without their own packaging
A unit without its own packaging uses the base unit packaging multiplied by the number of base units it holds.
e.g. If one Each weighs 2 lb and a Case holds 12, the Case counts as 24 lb. Items without any packaging keep using the item weight. - Units of the totals
Choose the Package Weight Unit and Package Volume Unit in Settings, Catalog Settings, Portal / Other. Packaging entered in other units is converted.
Learn more: /catalog_settings - Volumes on documents
Check Item Volume in the Invoice Configuration, Pick Ticket and Packing List settings to print the volume of each line and the total volume. - Shipping Weight
The Shipping Weight fields were removed from Edit Item and Edit Multiple Items; use the Packaging button instead. Existing shipping weights were copied to the base unit packaging weight, in pounds. For the Positive integration, the item cubic feet fill the base unit packaging volume on every item sync.
¶ Item Options
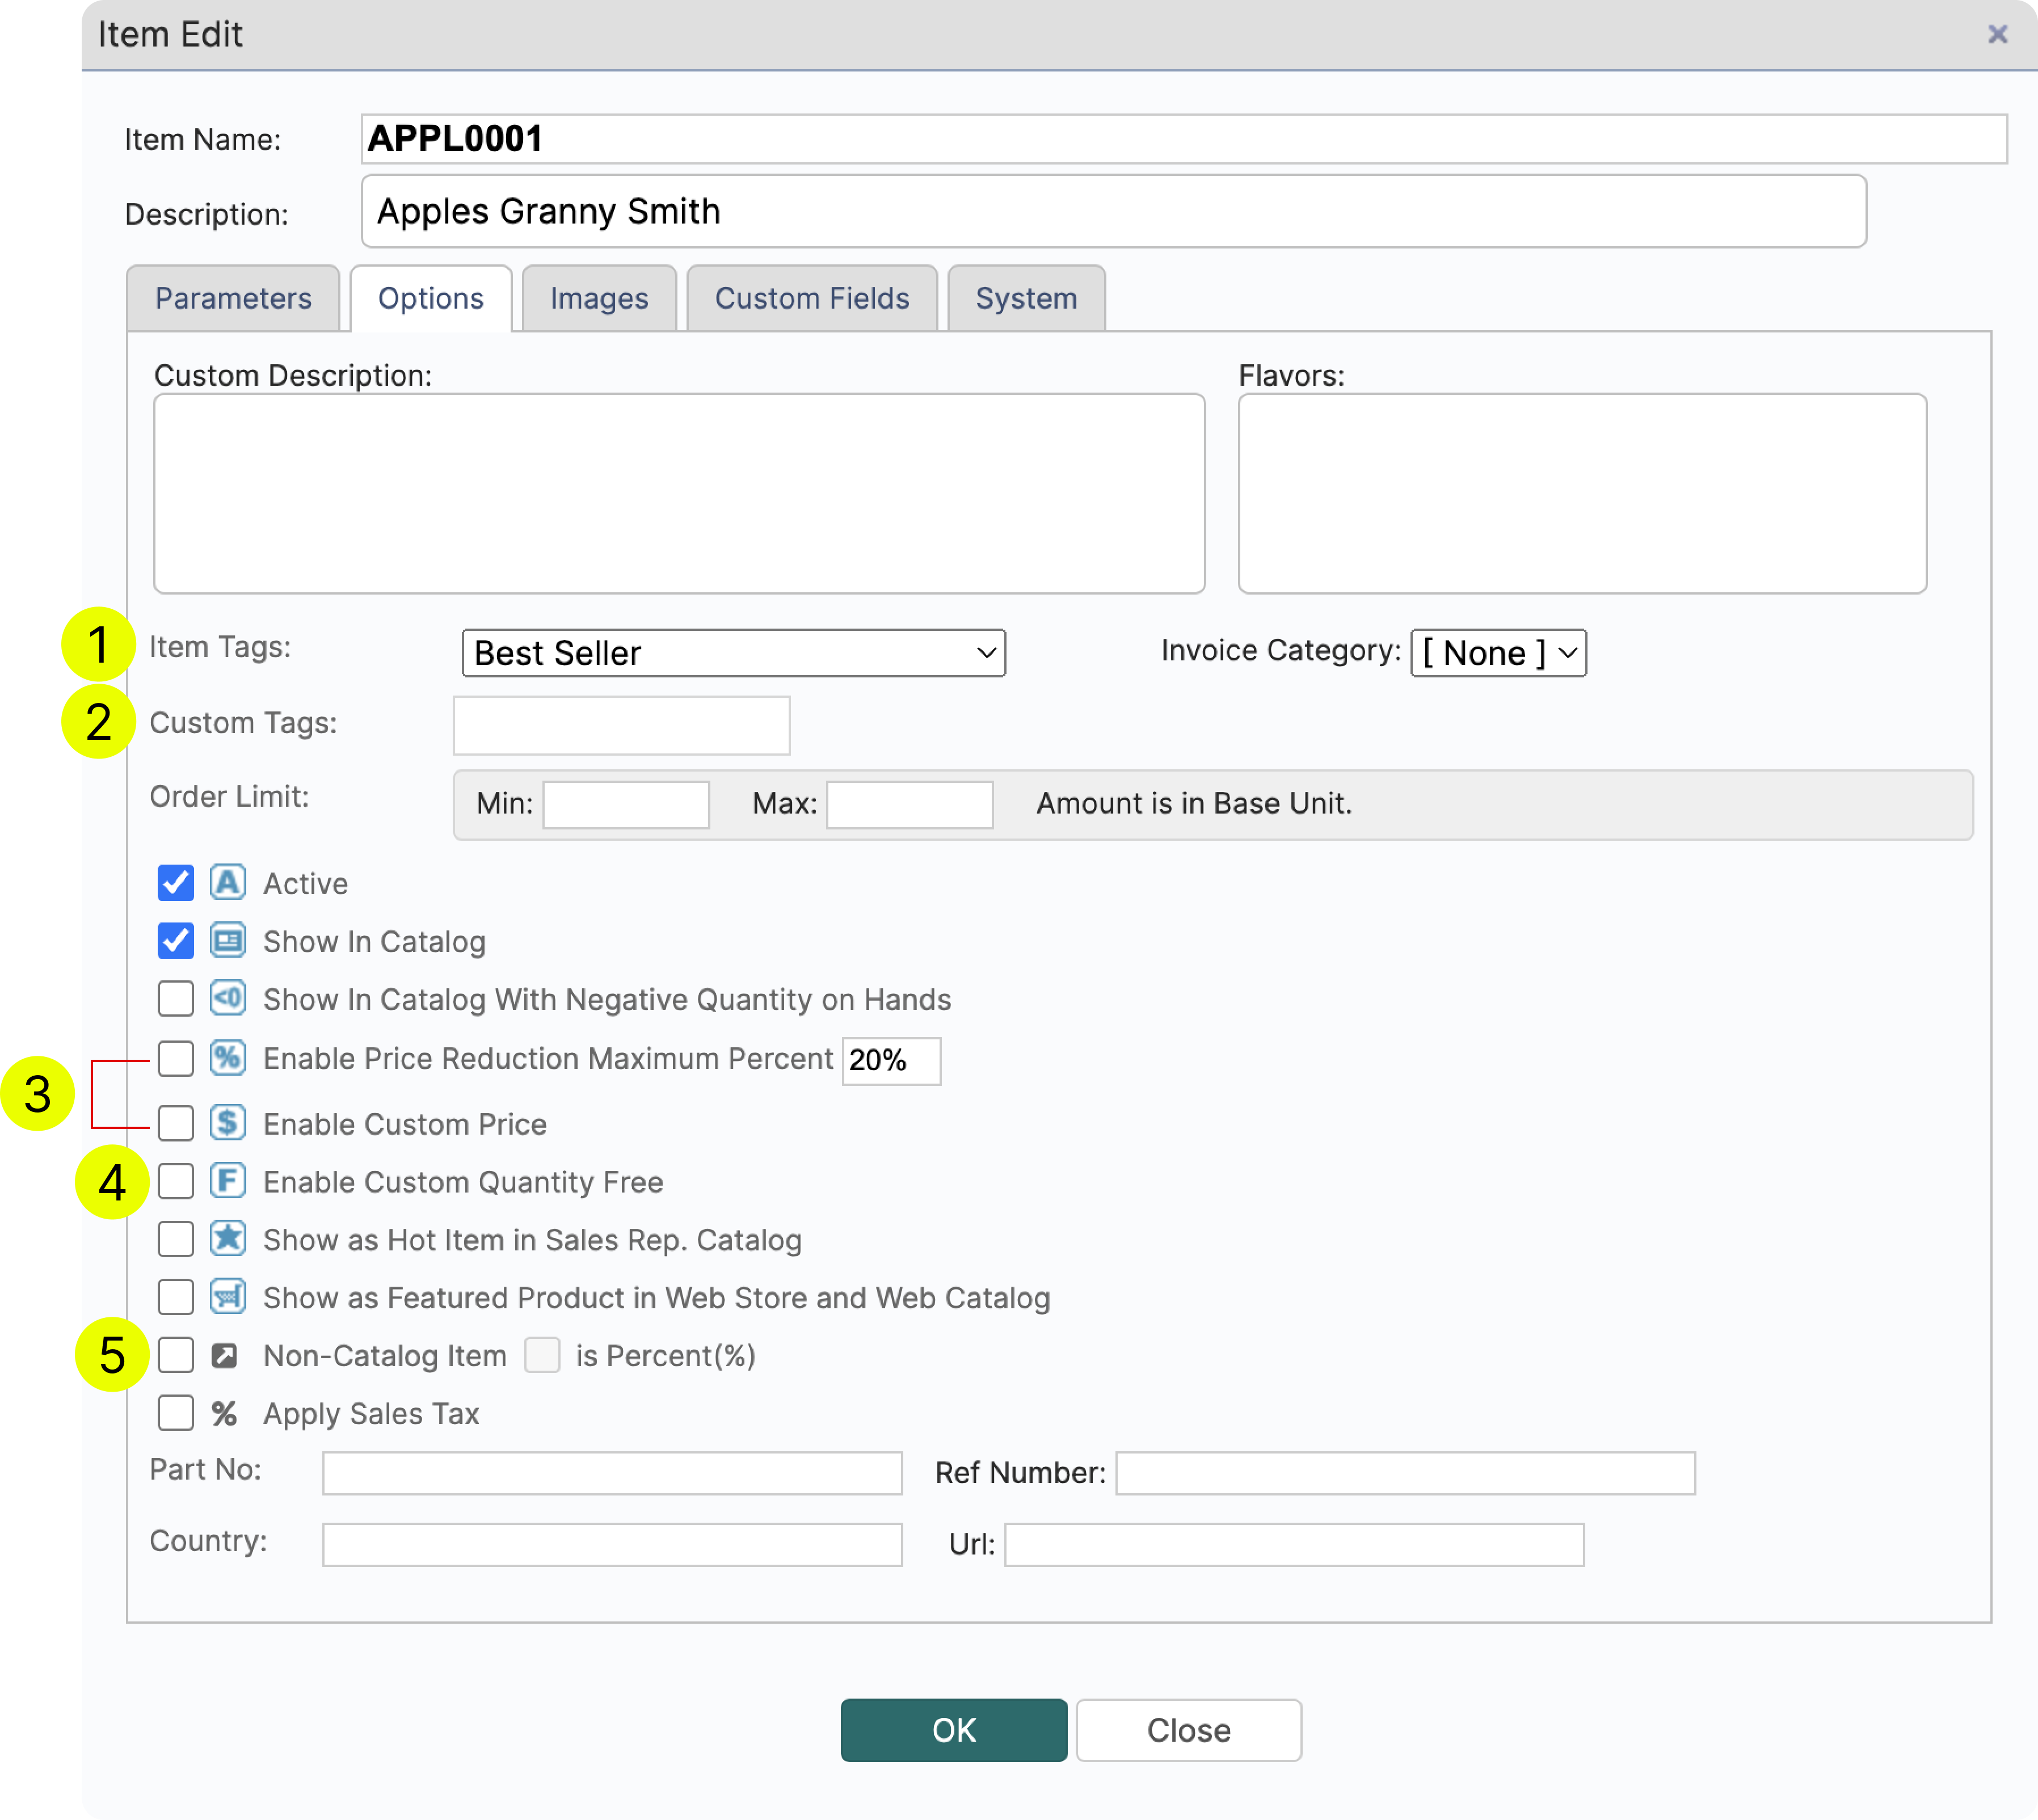
- Item Tags will appear in the item catalog and allow users to search by tags as well.
- Go to Tools -> Settings -> Tables to create new Custom Tags
- Allows Sales Reps to change the price, within the set parameters.
- If you are running promotions such as 10+1, checking this box allows sales reps to select the amount of free items.
- Non-Catalog Items do not show up in catalog. Generally used for fees, deposits and other special non-catalog items.
¶ Item Brands
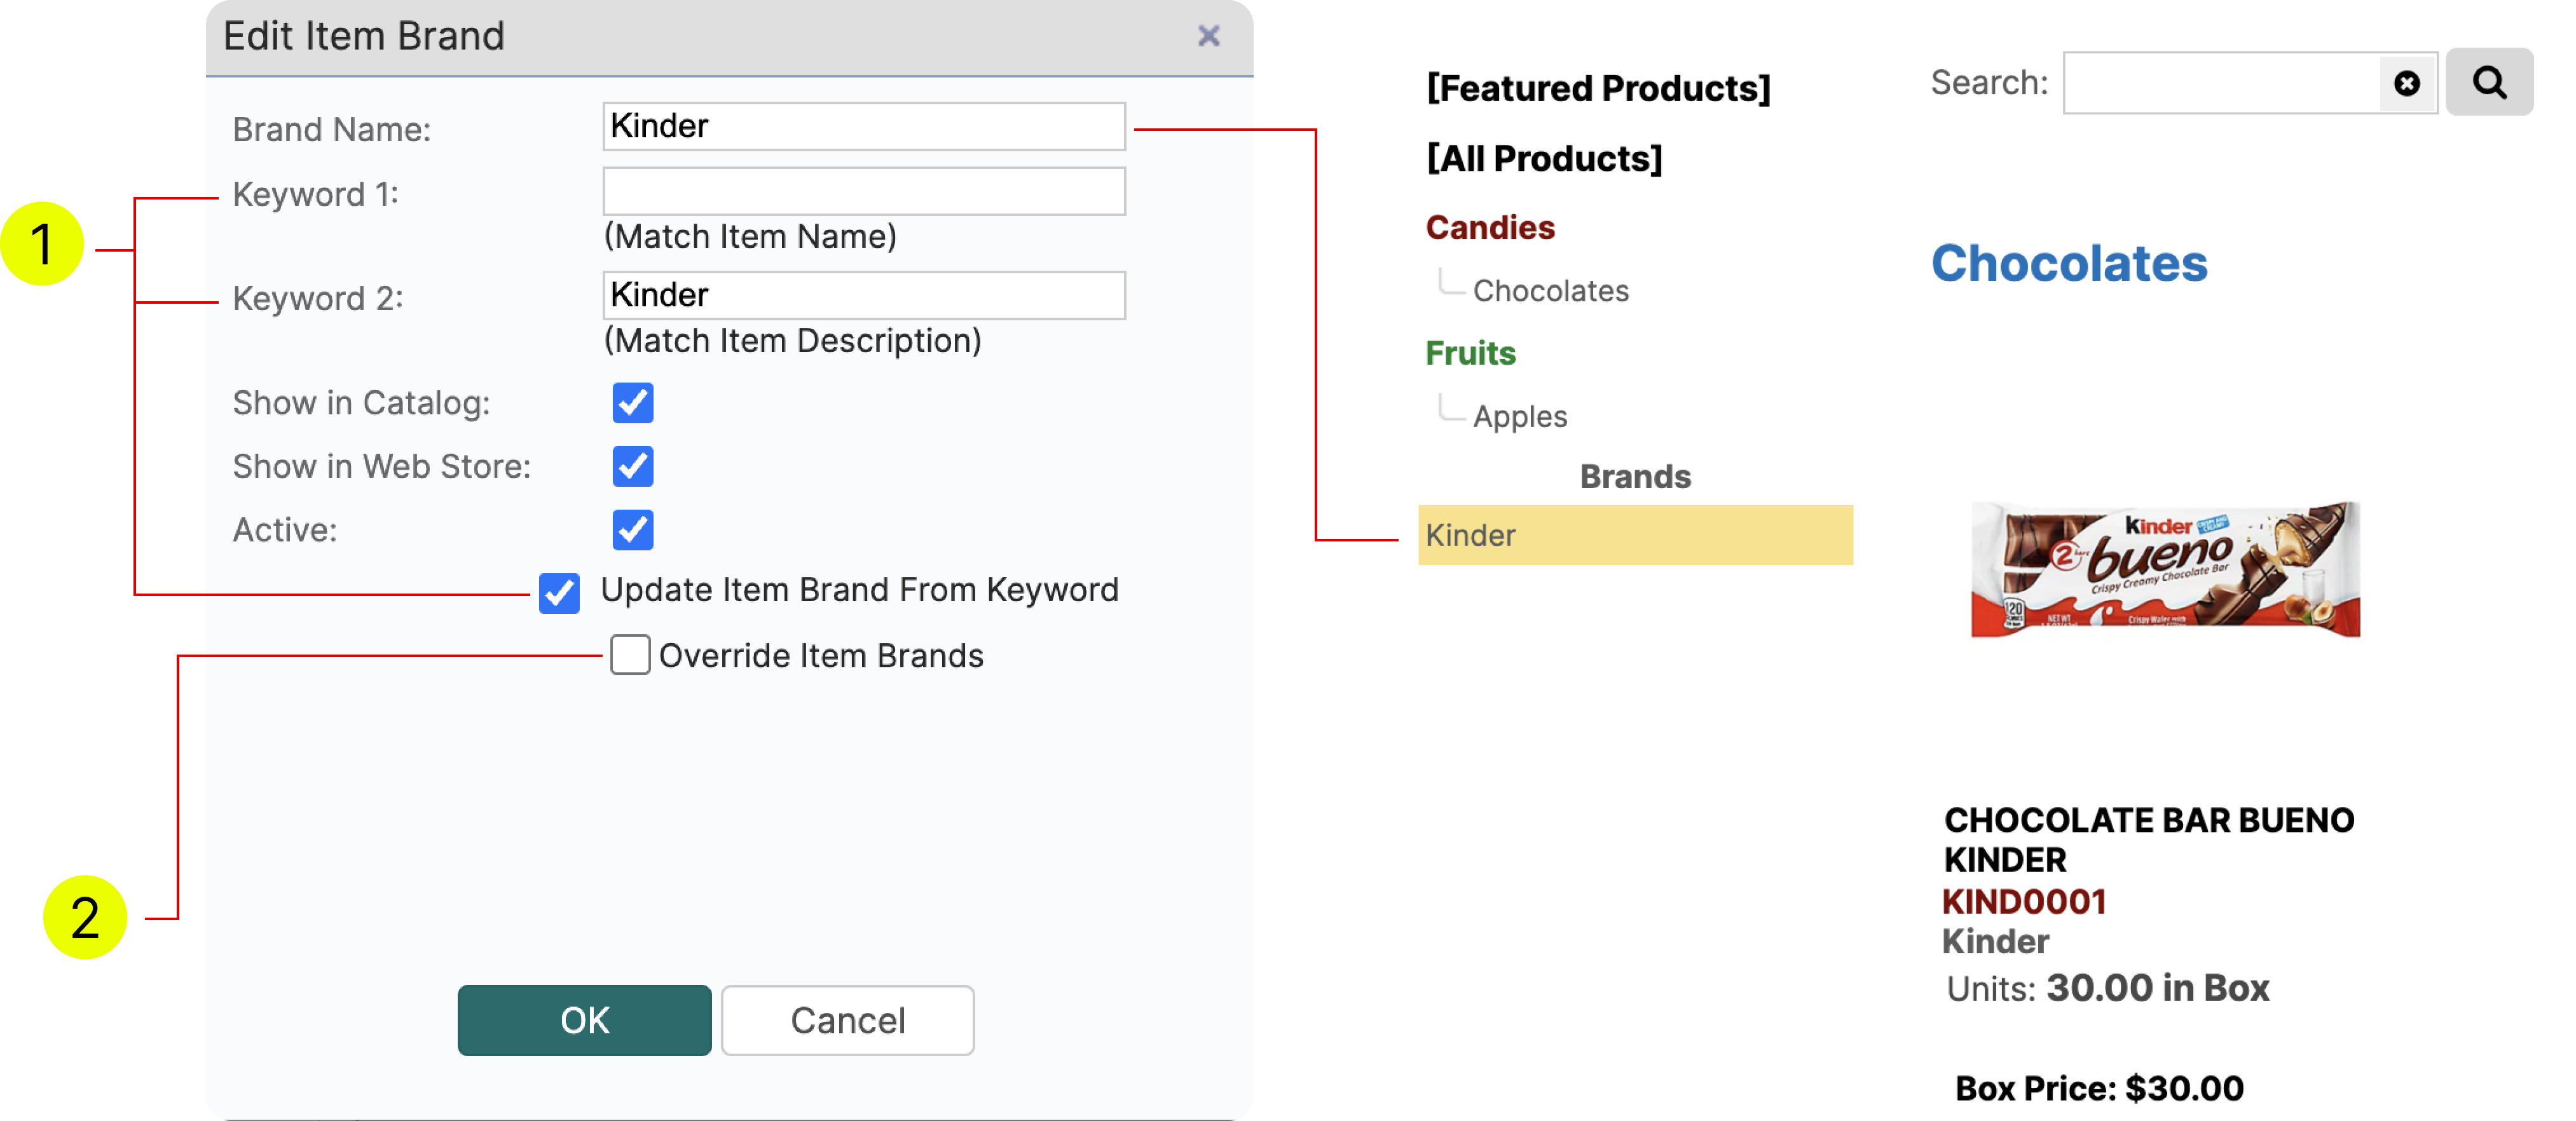
Creating Item Brands is an easy way to organize your products. Just create a new brand and LodDepot will automatically find the brand items and assign to corresponding brands.
- LodDepot will automatically assign products into categories based on keywords.
- Check this box to sort items into categories only once and opt-out of the automatic brand assignment.